How To LineWeld
What is a LineWelder™?
Tauten LineWelder technology uses a specially formulated thermoplastic polymer material to bond monofilament, flurorocarbon, and braided lines with no knots required!
The Tauten LineWelder TLW1000 is a compact, hand held, USB-chargeable device that can be used with fishing line up to .013″ in diameter, or 12 lb test monofilament or fluorocarbon, and up to 50 lb test braid.
![]()
The Tauten LineWelder TLW30 is a two-part system that uses held held polymer applicator to inject Tauten’s unique bonding material into a specially designed mold fixture. This system works with fishing line up to .022″ in diamater, or 30 lb test monofilament or fluorocarbon.
All LineWelder systems are capable of both creating loops to attach hooks and lures, or effortlessly bonding two lines together. View the slideshows and tutorial videos below to learn how to use your LineWelder!
Table of Contents
TL30 Tutorials
Creating Loops and Braid-to-Mono/Fluoro Bonds with your TLW30
Creating a loop with your TLW30

Step 1 - Clean Your Line
Wipe down the section of lines to be welded with an alcohol wipe 6-7 times. NOTE: this step is not needed for Tauten CleanLine™, which is pre-treated to remove surface chemicals.
Step 2 - Pass Line Through Eyelet
Pass your line through the eyelet of your hook, lure, or other implement you will be forming the loop around.
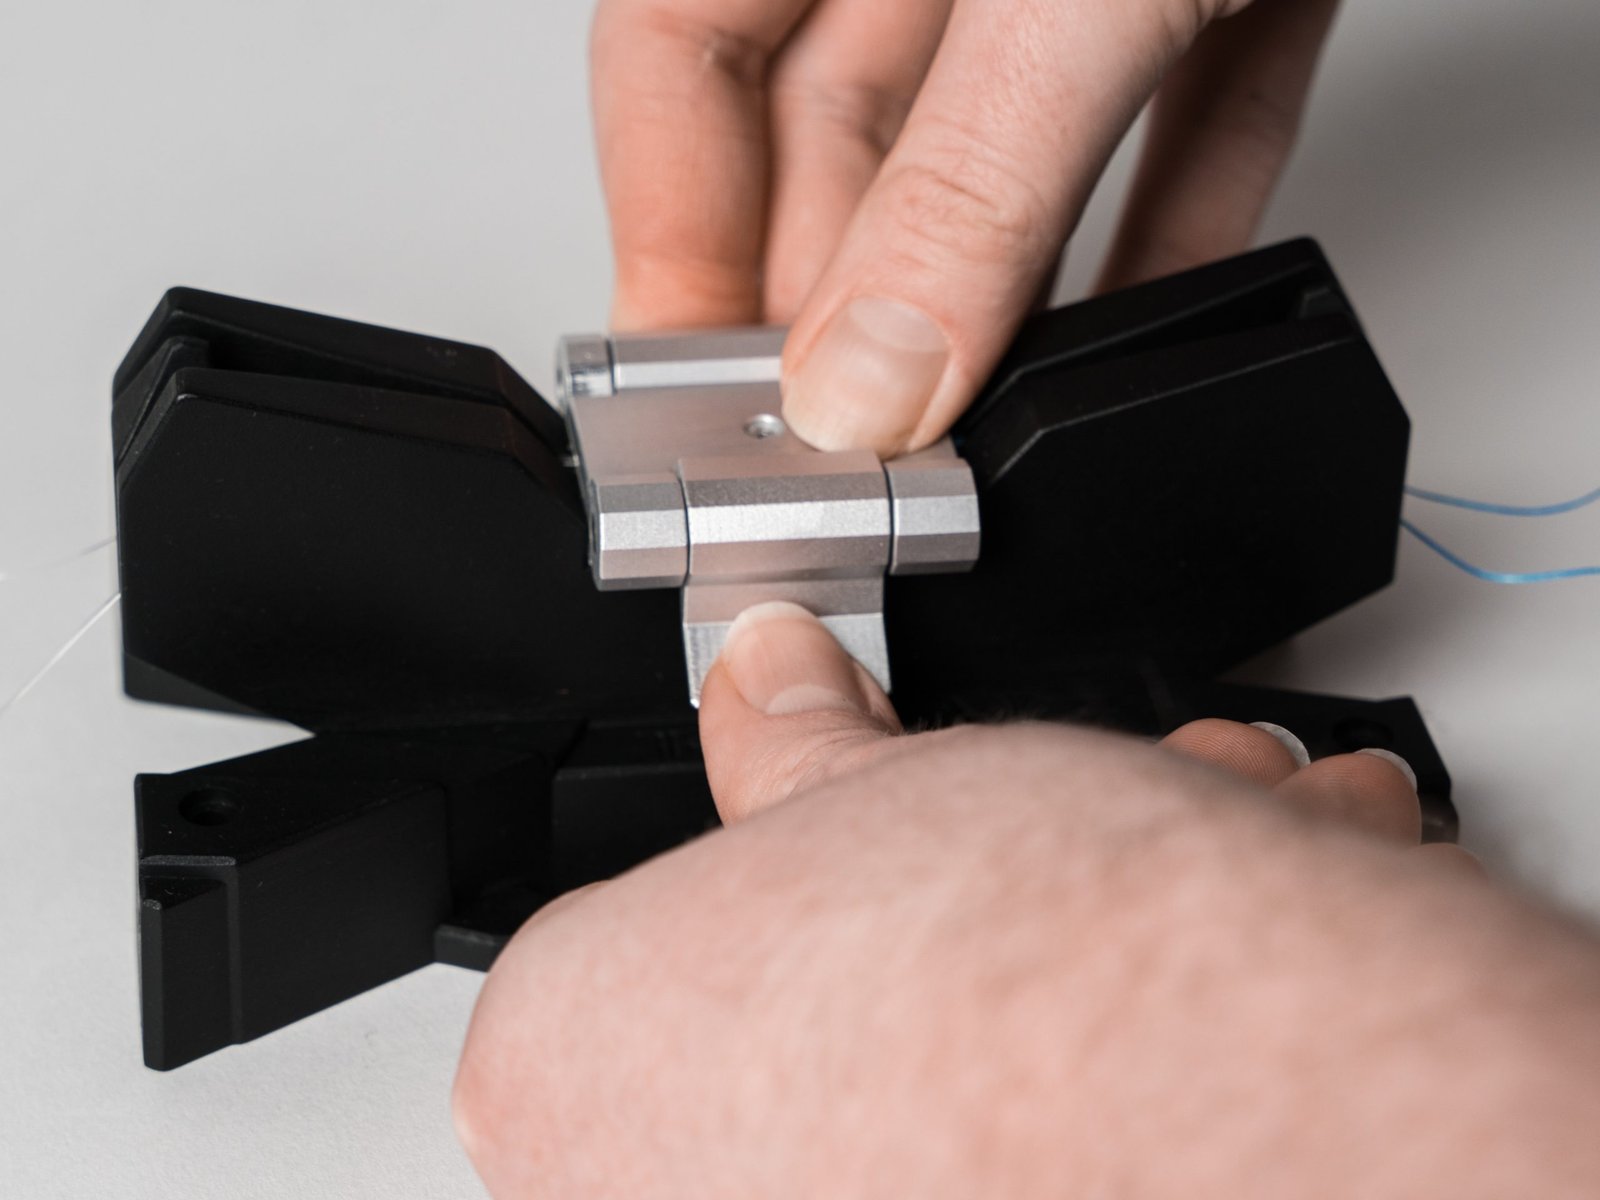
Step 3 - Lower Lines Into Fixture
Lower the line into the mold fixture, with each end of running through a separate groove of the line organizer. Make sure that the lines don't cross over each other anywhere within the mold.
Step 4 - Close Latch and Adjust
Close mold door keeping lines in alignment grooves, then slide the lines through mold while it is closed to adjust to desired loop size, with the hook or lure abutting the mold.

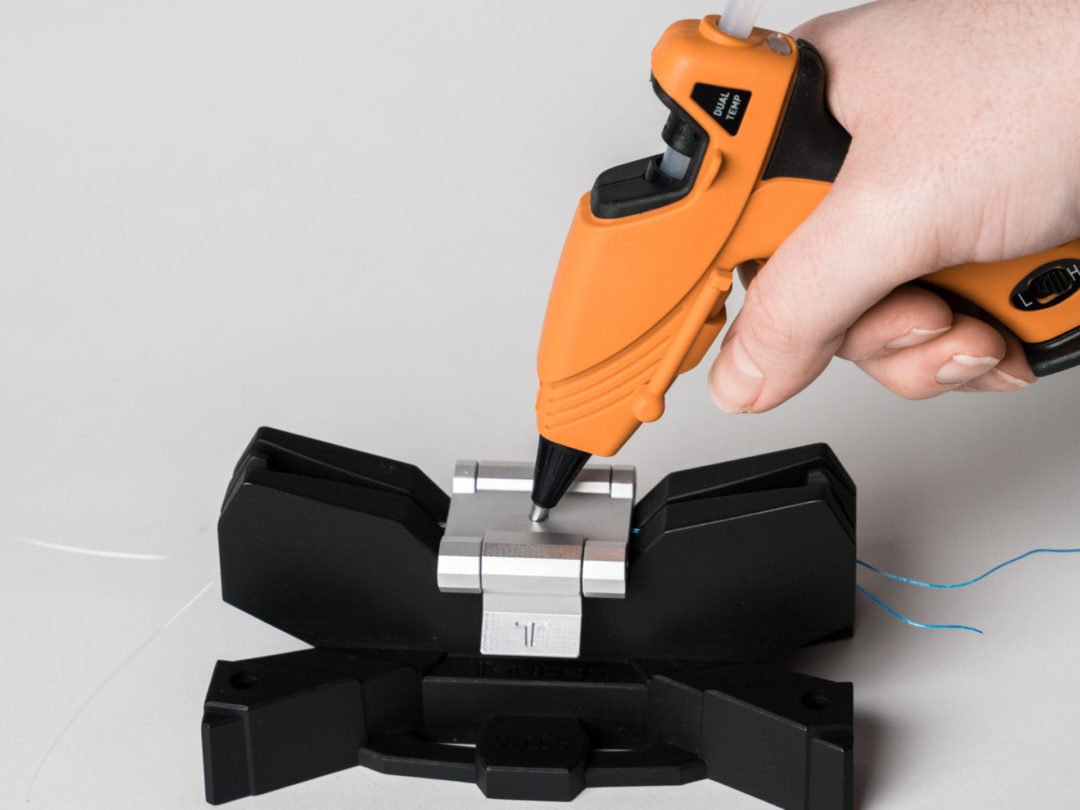
Step 5 - Inject Polymer
Plug in the applicator gun to a 120V outlet, insert a polymer stick into the feeder tube, an allow it to heat for approximately 5 minutes. Place the tip of the adhesive applicator flush with the port at the top of the mold frame and inject polymer by pulling the trigger four (4) times. NOTE: pulling the trigger more than 4 times can damage the applicator or overfill the mold.

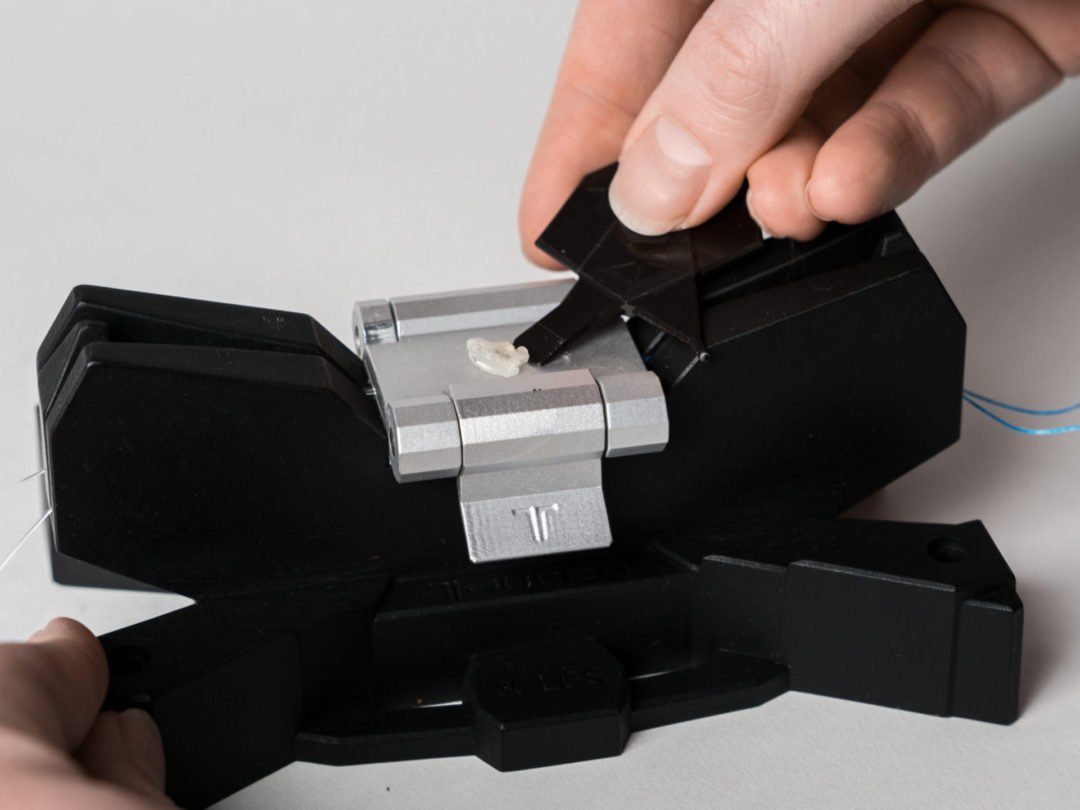
Step 6 - Cool and Clean Mold
Wait 60 seconds for the adhesive to cool, then remove any excess polymer using the mold cleaning tool.
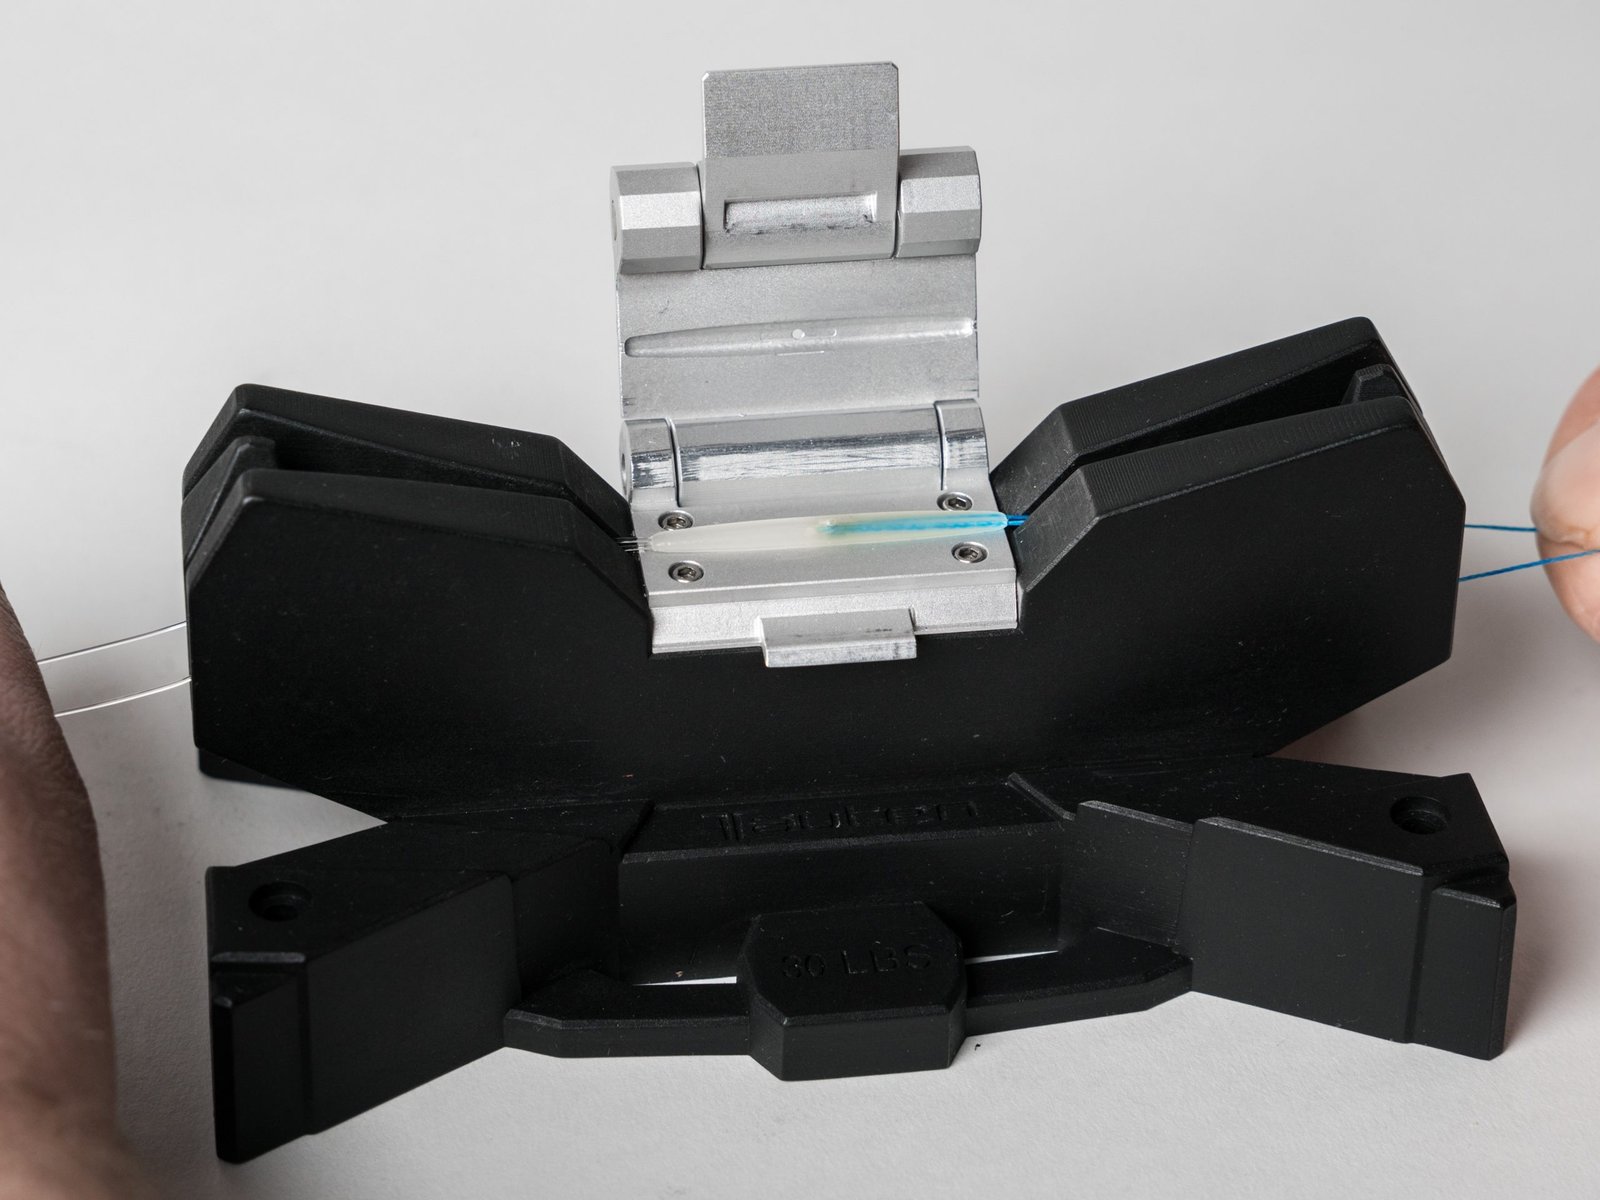
Step 7 - Open Mold
Unlatch the mold frame door and open it, then remove lines from their alignment grooves, and lift the completed weld from the mold frame.

Step 8 - Trim Tag Ends
Using a Tauten LineCutter™ (not included), or similar cutting tool, trim the tag ends from the end of the weld sleeve to avoid catching.
Step 9 - Finished!
Your LineWeld is now complete!
Creating Braid-to-Mono/Fluoro Bonds with your TLW30
Step 1 - Clean Your Line
Wipe down the section of lines to be welded with an alcohol wipe 6-7 times. NOTE: this step is not needed for Tauten CleanLine™, which is pre-treated to remove surface chemicals.
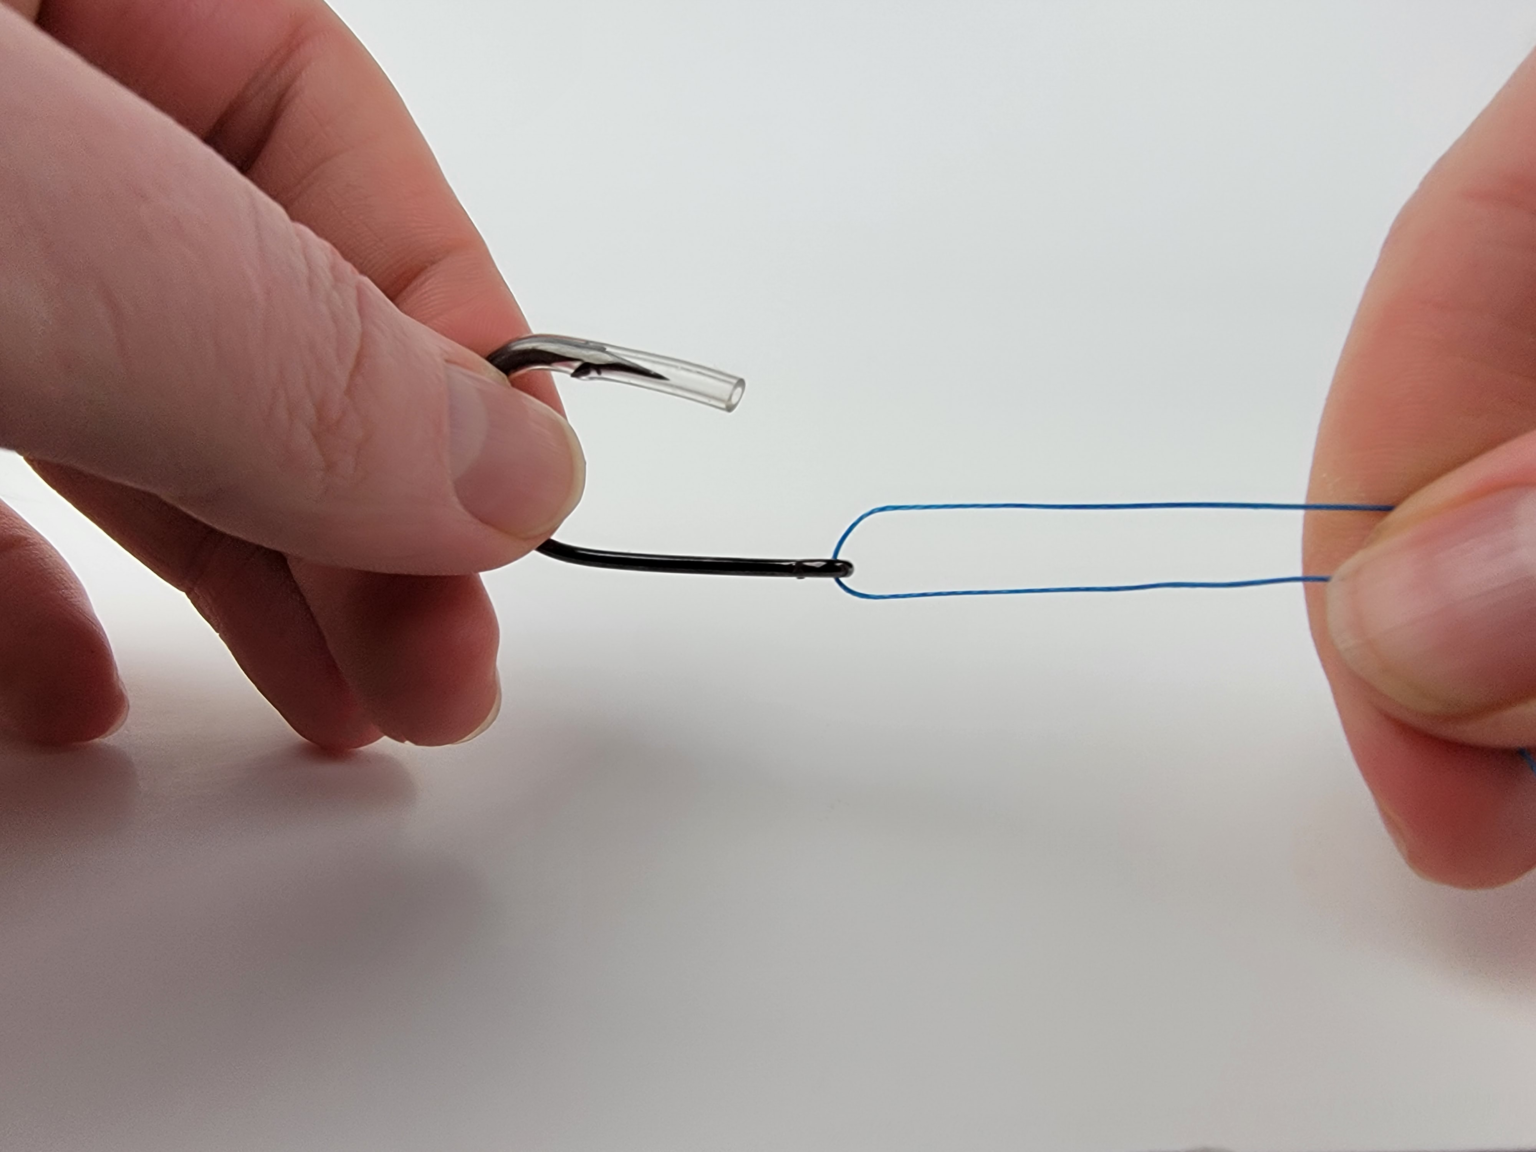
Step 2 - Loop Lines Together
Form a loop of monofilament through a loop of braid and tension the lines together, making sure there are no twists in them.
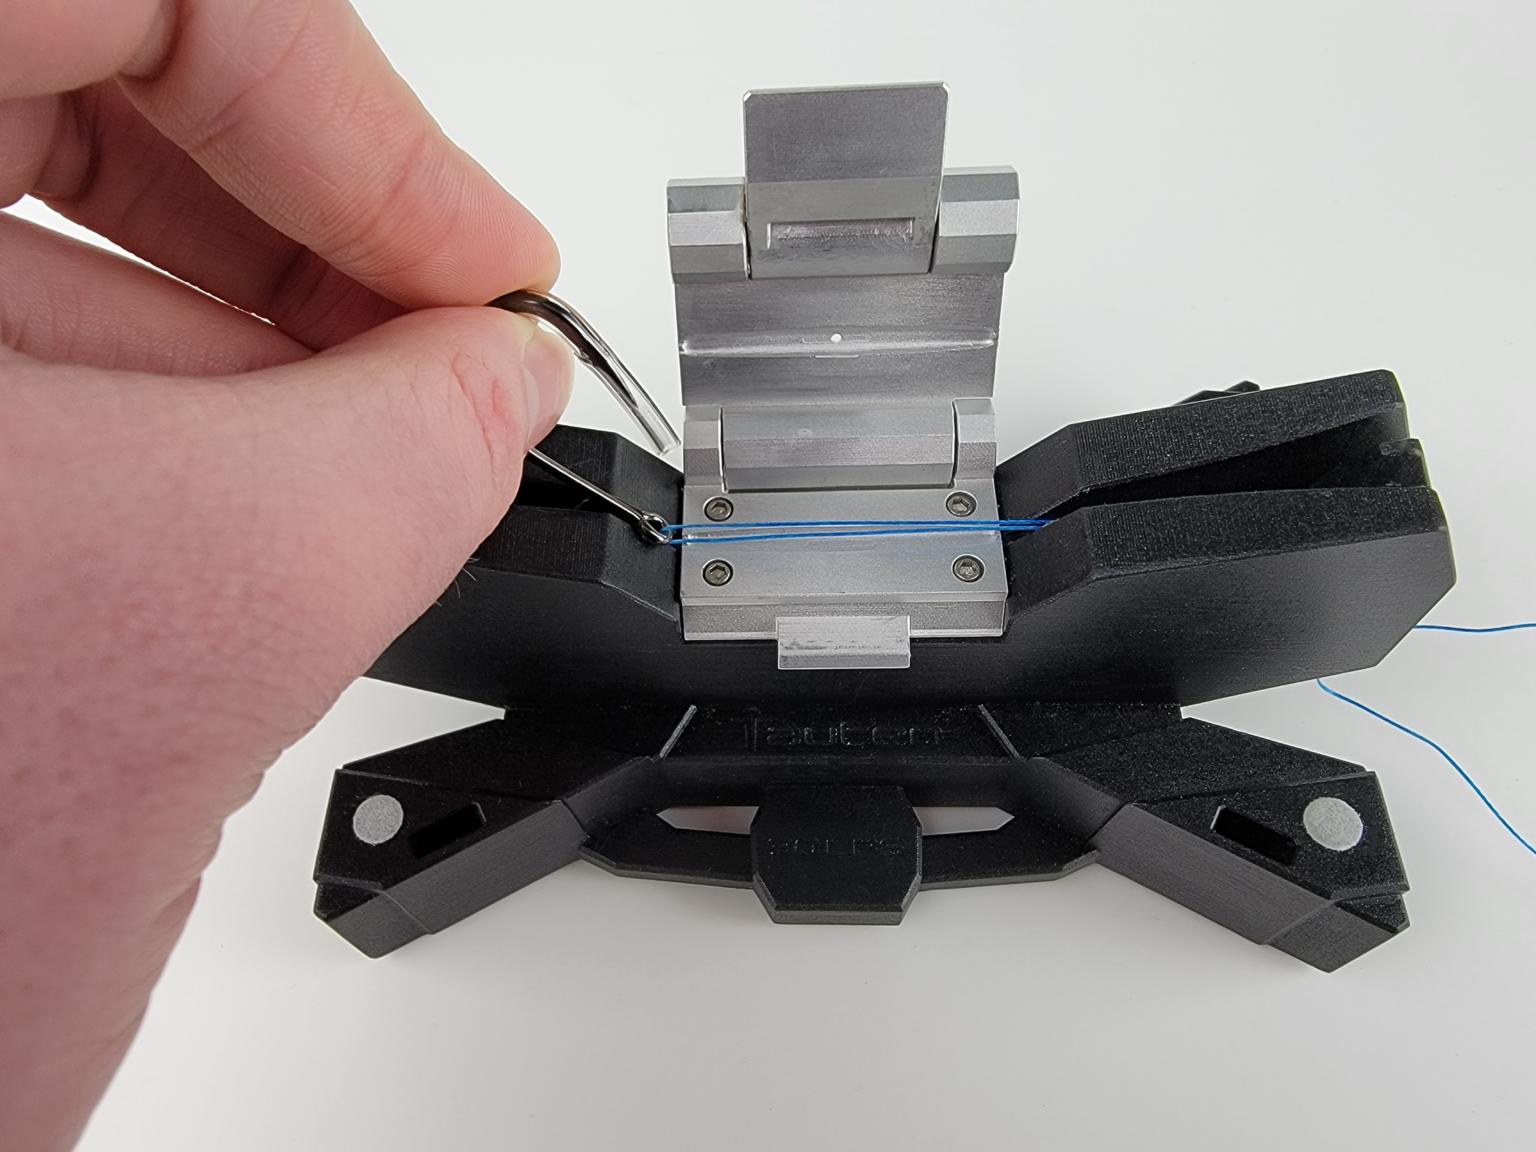
Step 3 - Lower Lines into Fixture
Lower the lines into the mold fixture, with each end of each line running through a separate groove of the line organizer. Adjust the line segments to center of mold by pulling the two ends of one line together.
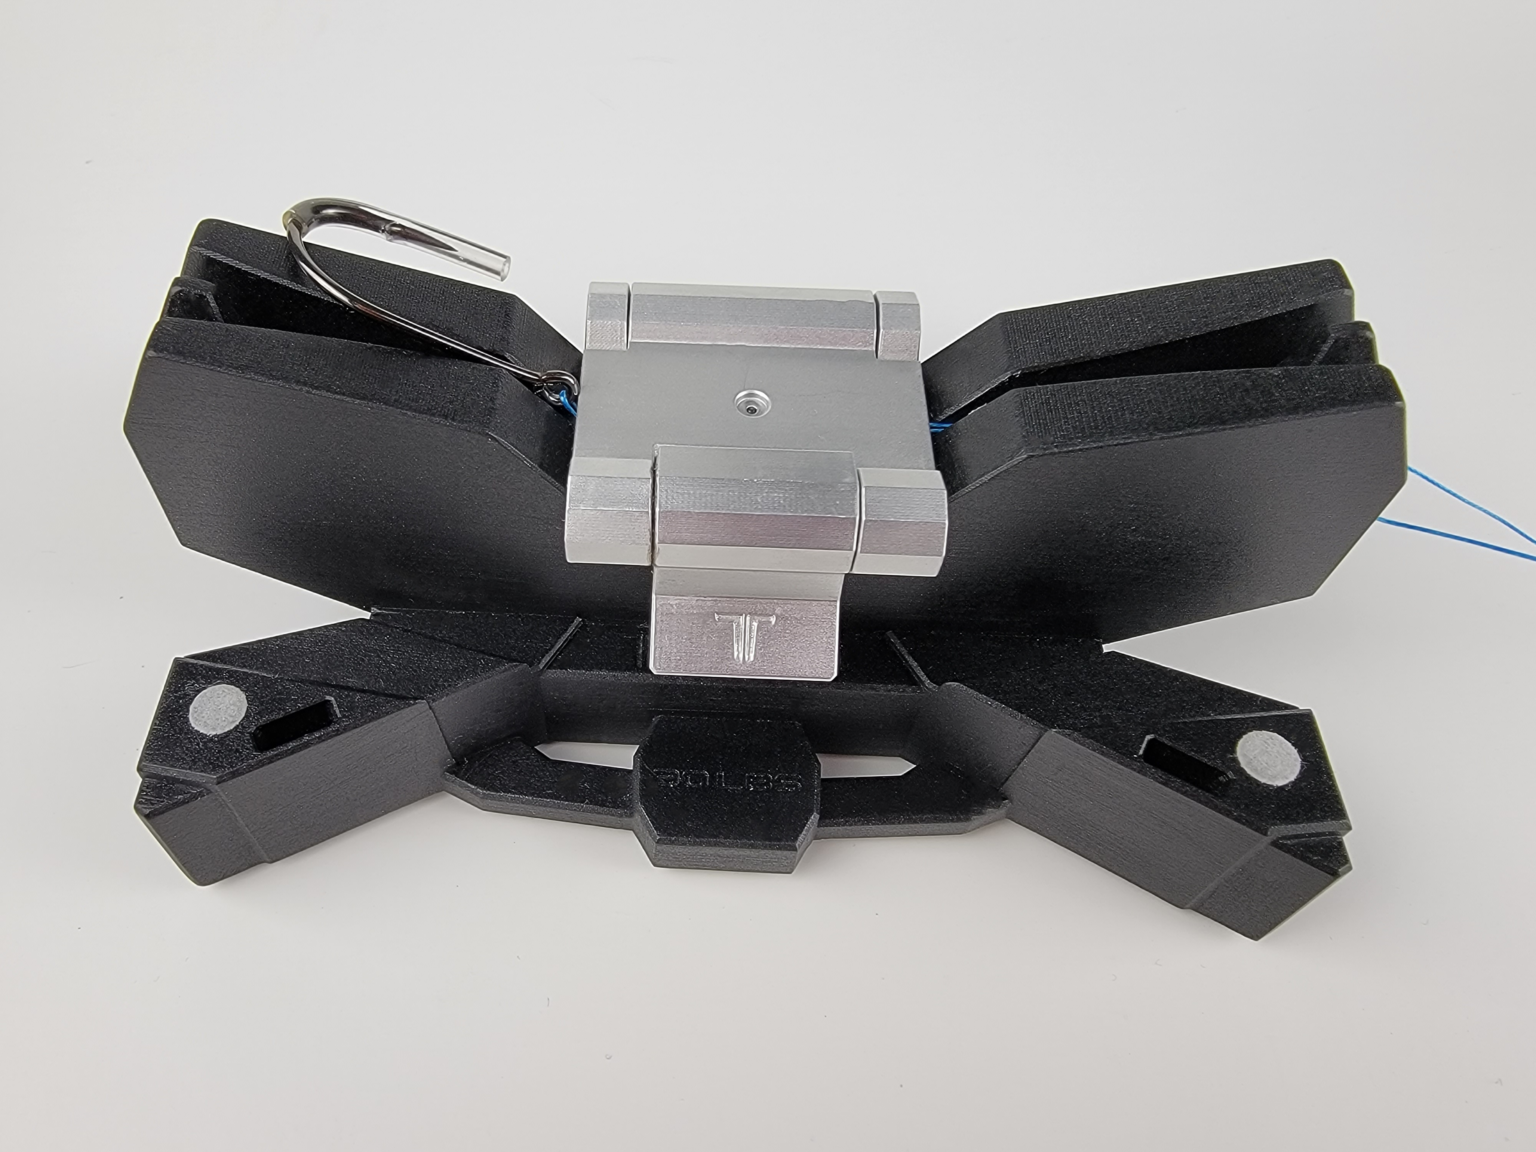
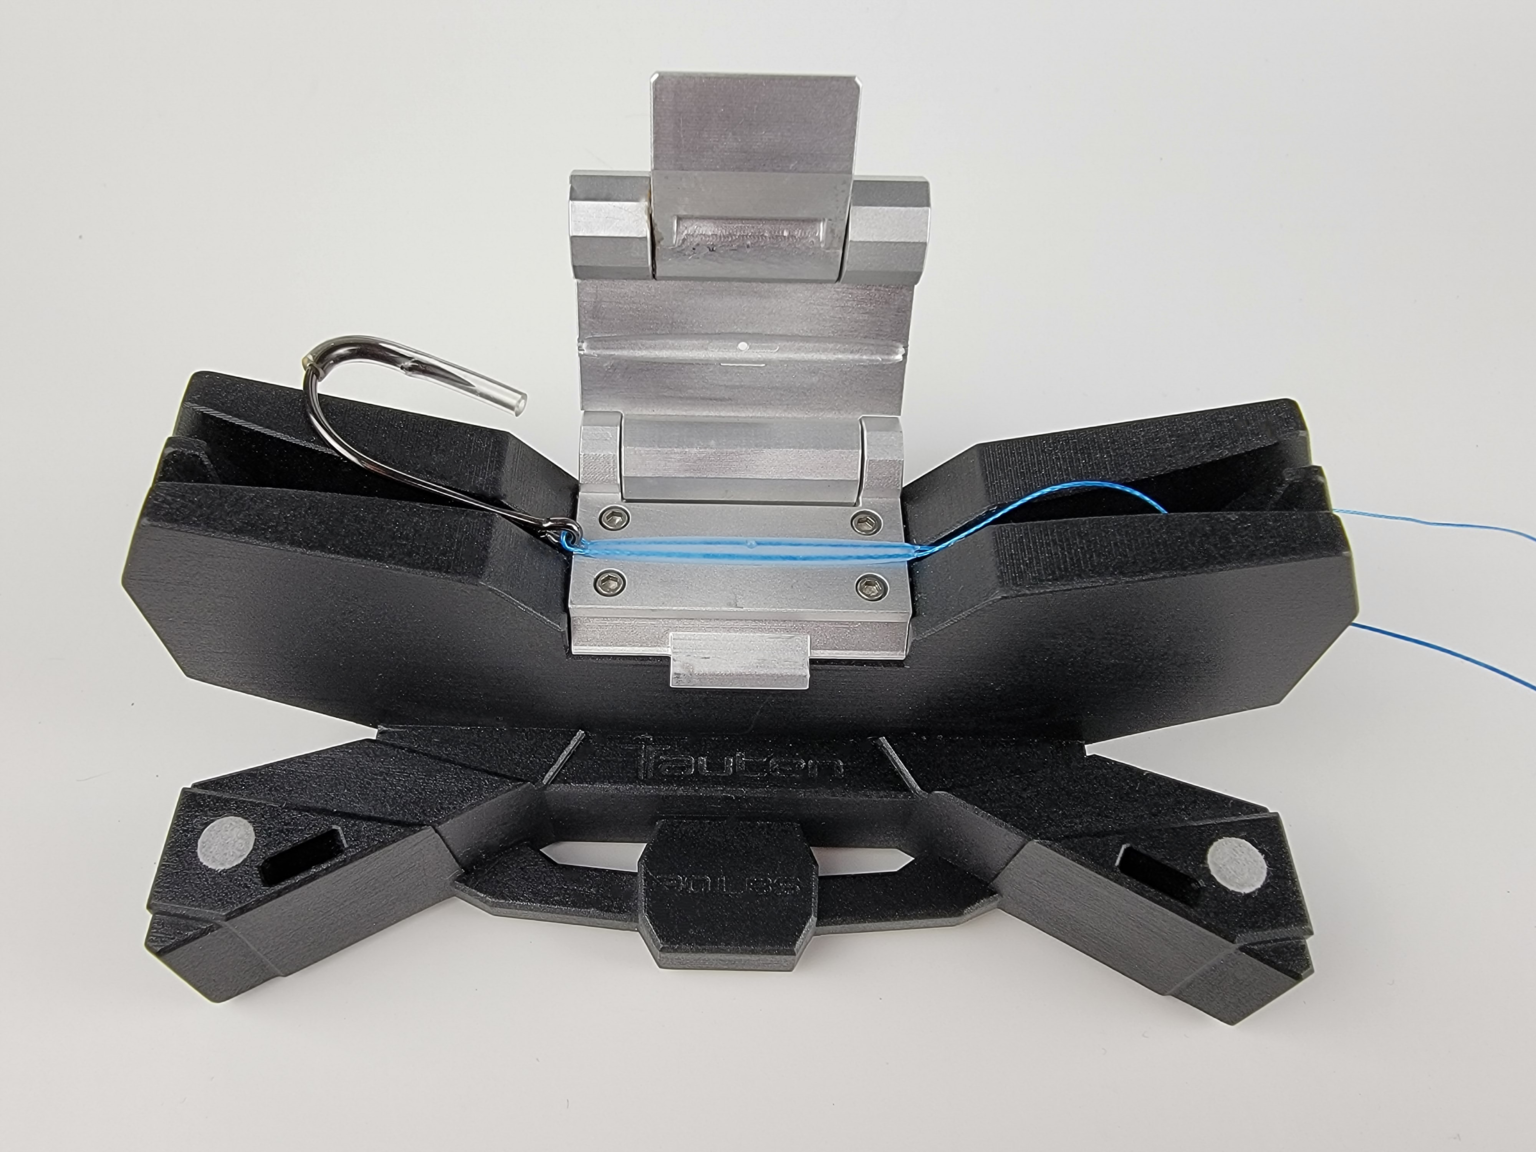
Step 4 - Close Mold Lid and Latch
Make sure the lines are taut and loop in the center of the mold, then close the lid and push down on the latch to lock it in place.
Step 5 - Inject Polymer
Plug in the applicator gun to a 120V outlet, insert a polymer stick into the feeder tube, an allow it to heat for approximately 5 minutes. Place the tip of the adhesive applicator flush with the port at the top of the mold frame and inject polymer by pulling the trigger four (4) times. NOTE: pulling the trigger more than 4 times can damage the applicator or overfill the mold.
Step 6 - Cool and Clean Mold
Wait 60 seconds for the adhesive to cool, then remove any excess polymer using the mold cleaning tool.
Step 7 - Open Mold
Unlatch the mold frame door and open it, then remove lines from their alignment grooves, and lift the completed weld from the mold frame.
Step 8 - Trim Tag Ends
Using a Tauten LineCutter™ (not included), or similar cutting tool, trim the tag ends from the end of the weld sleeve to avoid catching.

Step 9 - Finished!
Time to get fishing! Your LineWeld is now complete.
TLW1000 Tutorials
Getting Started - Creating a loop with your TLW1000
Without any accessories, the LineWelder can create perfect loops to attach any manner of hook or lure to a line in seconds.

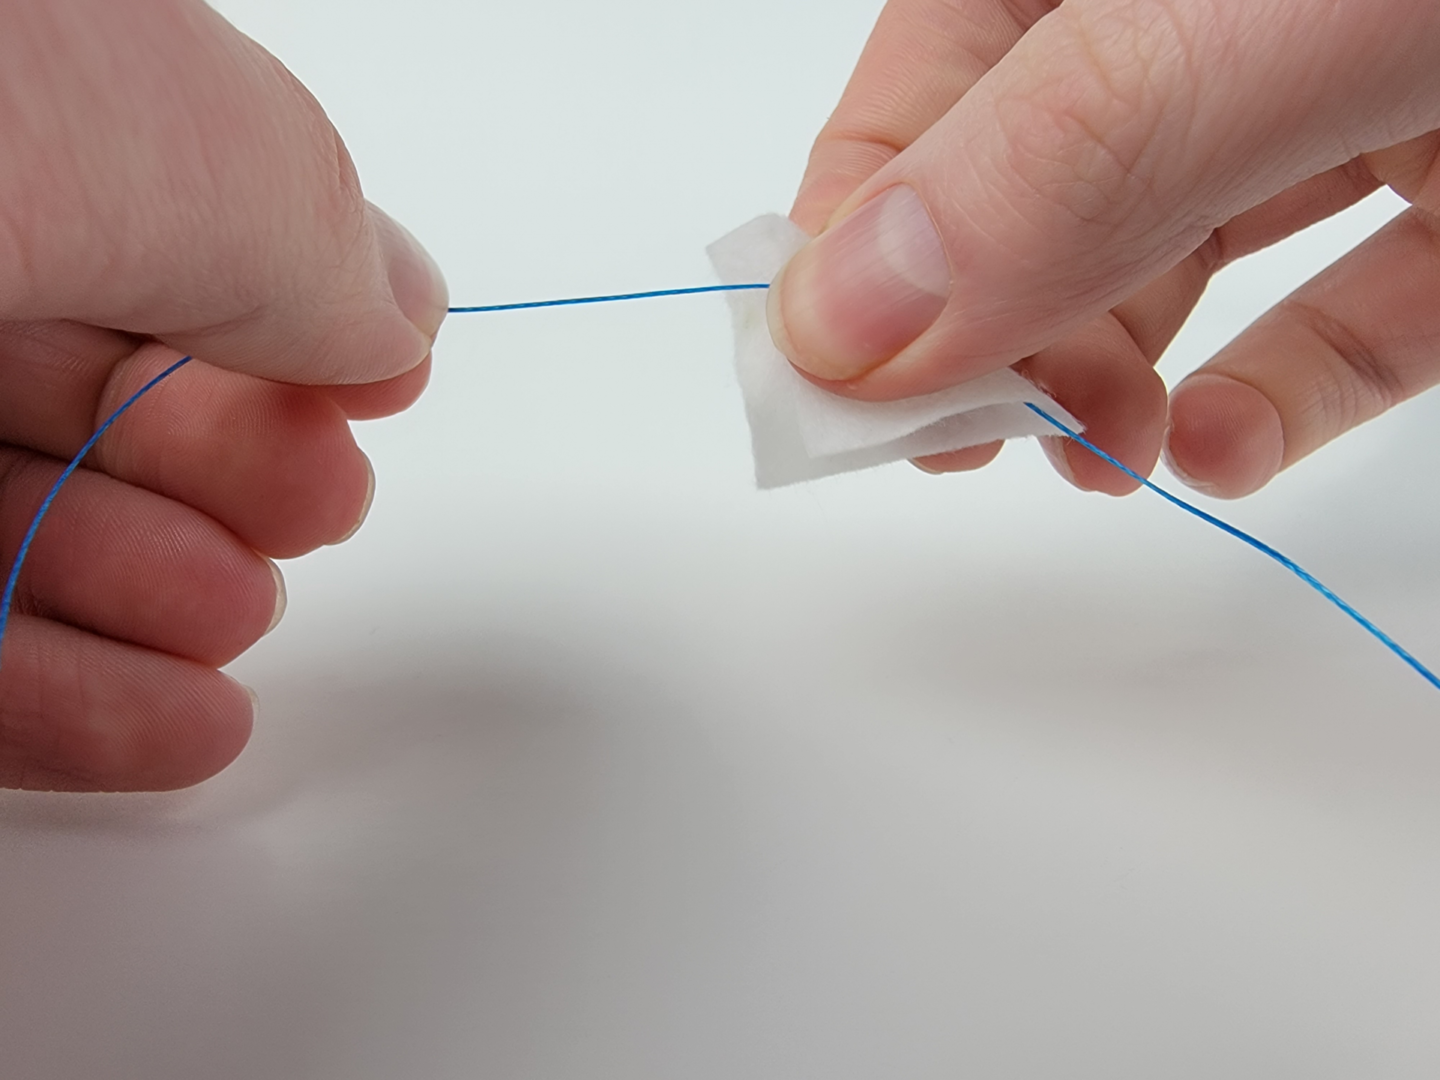
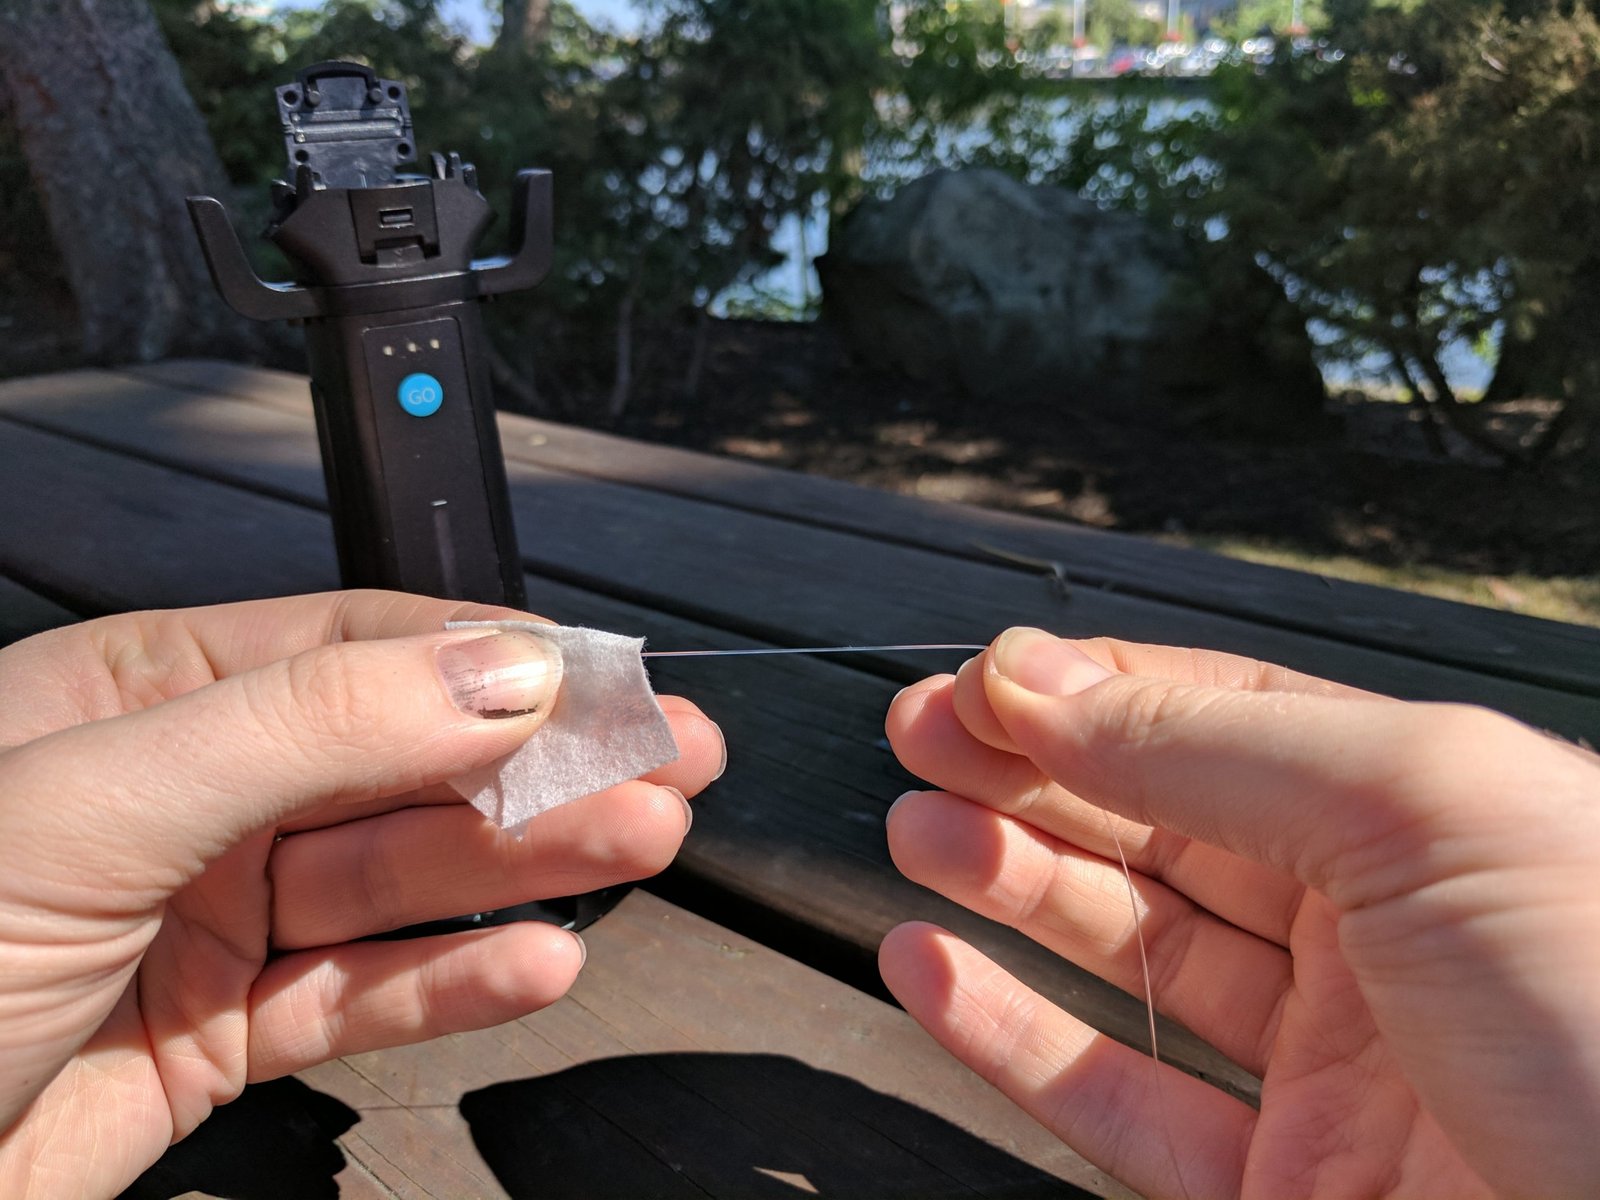
Step 1 - Clean Your Line
Clean the section of the line to be welded by wiping 6-7 times with an alcohol prep pad. This will remove any coating that could interfere with the welding process. Alternatively, if you're using Tauten MonoWeld monofilament line you can skip this step!
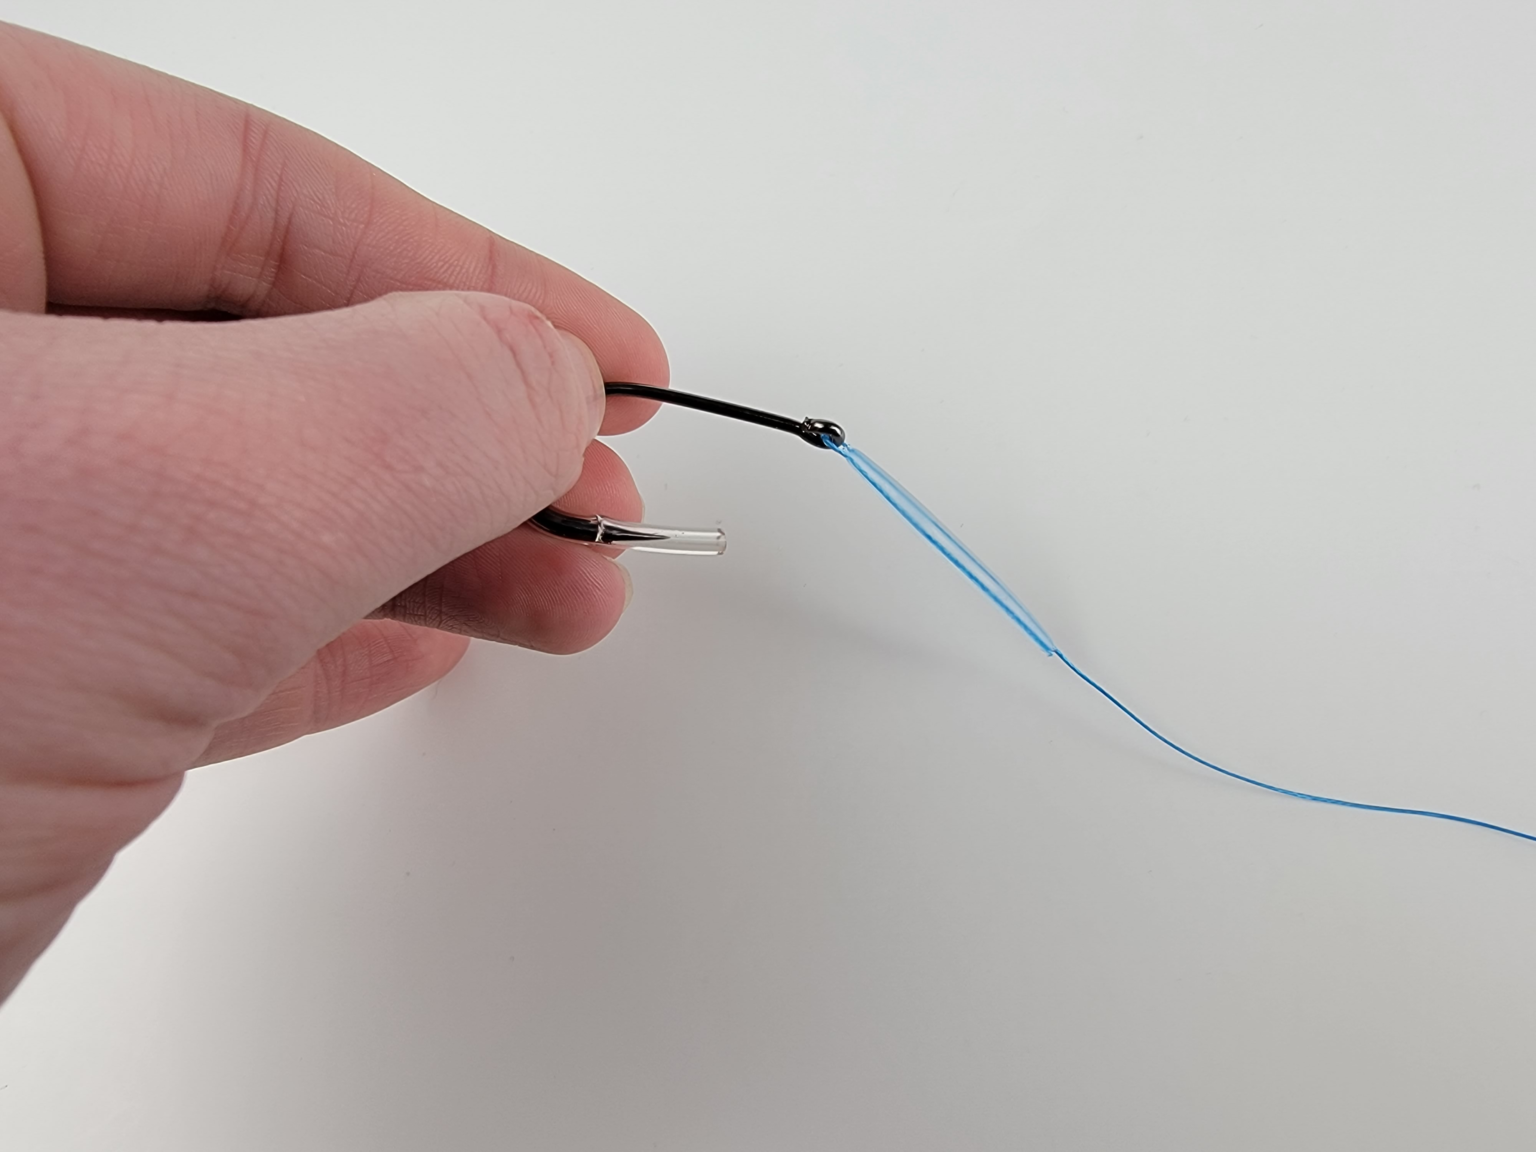
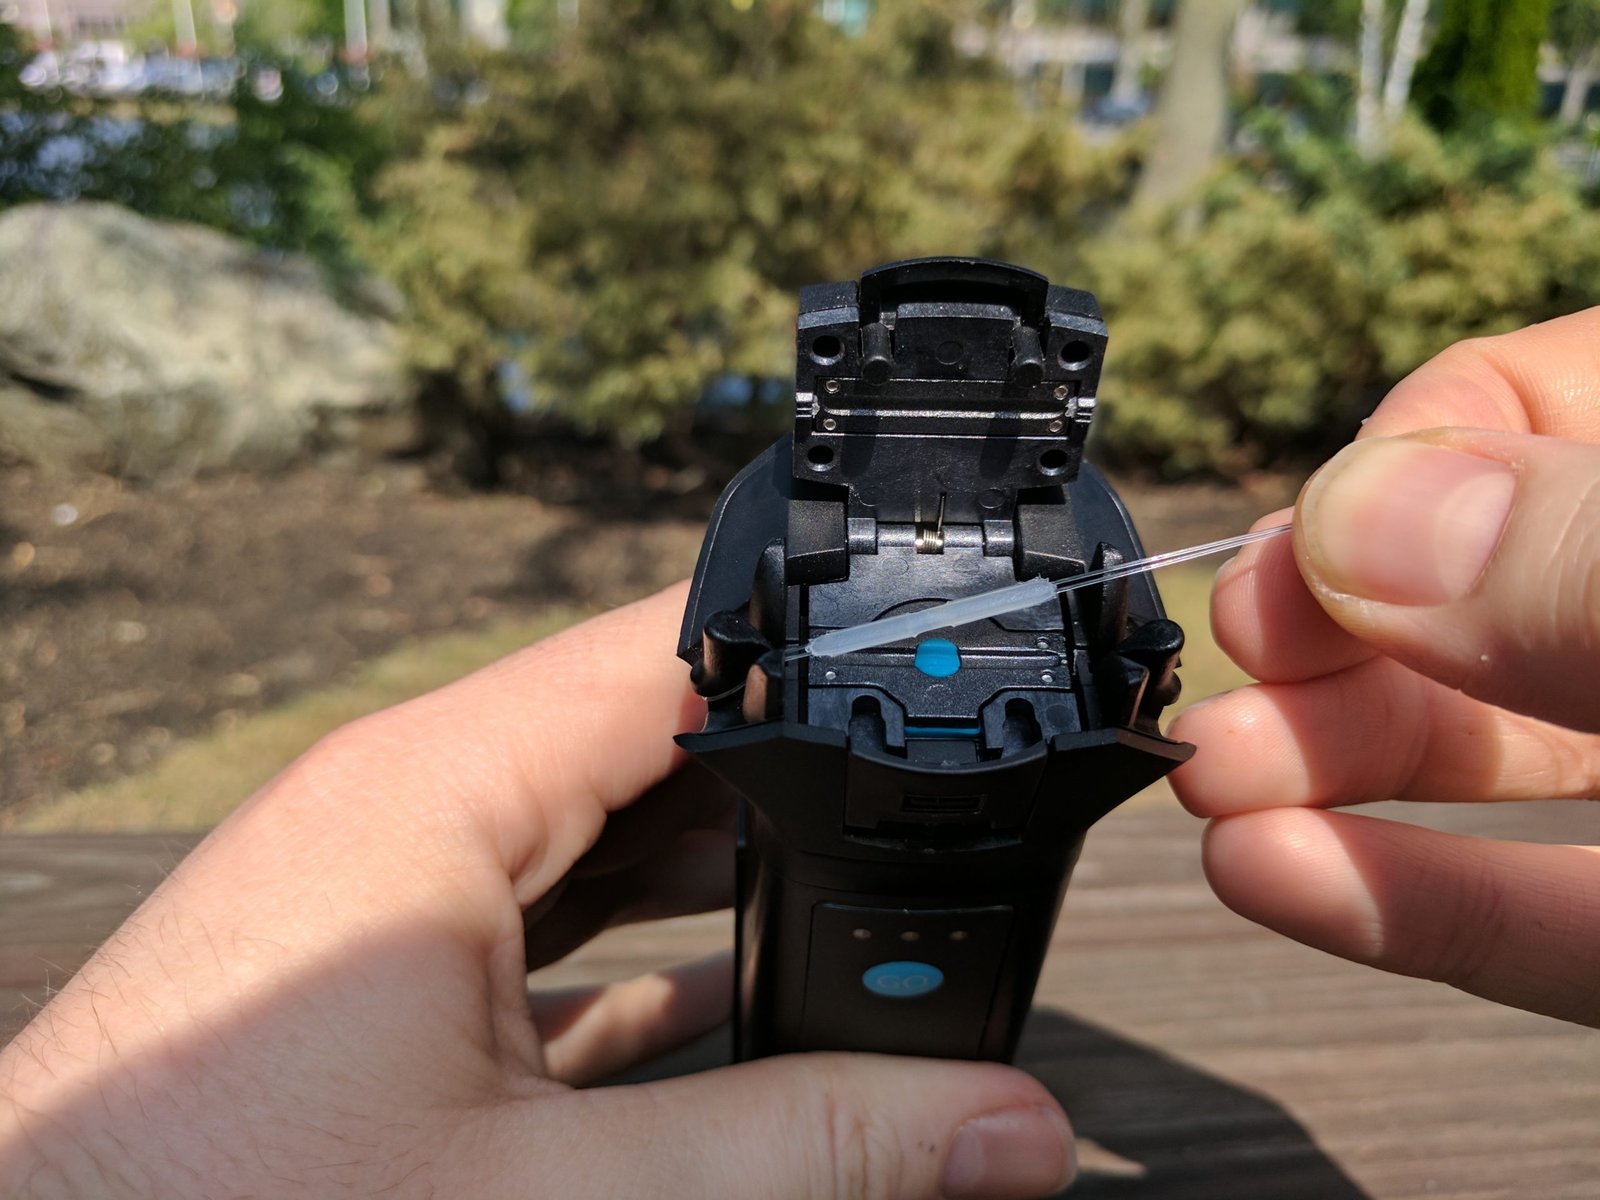
Step 2 - Insert Lines Into LineWelder
Loop your line around one of the posts on the head of the LineWelder and lay along the center cavity so that the ends of the line extend out of the opposite side of the LineWelder head.

Step 3 - Close Latch
Close cover of the LineWelder head and push the latches closed to lock it in place. Then press the blue GO button to begin the welding process!
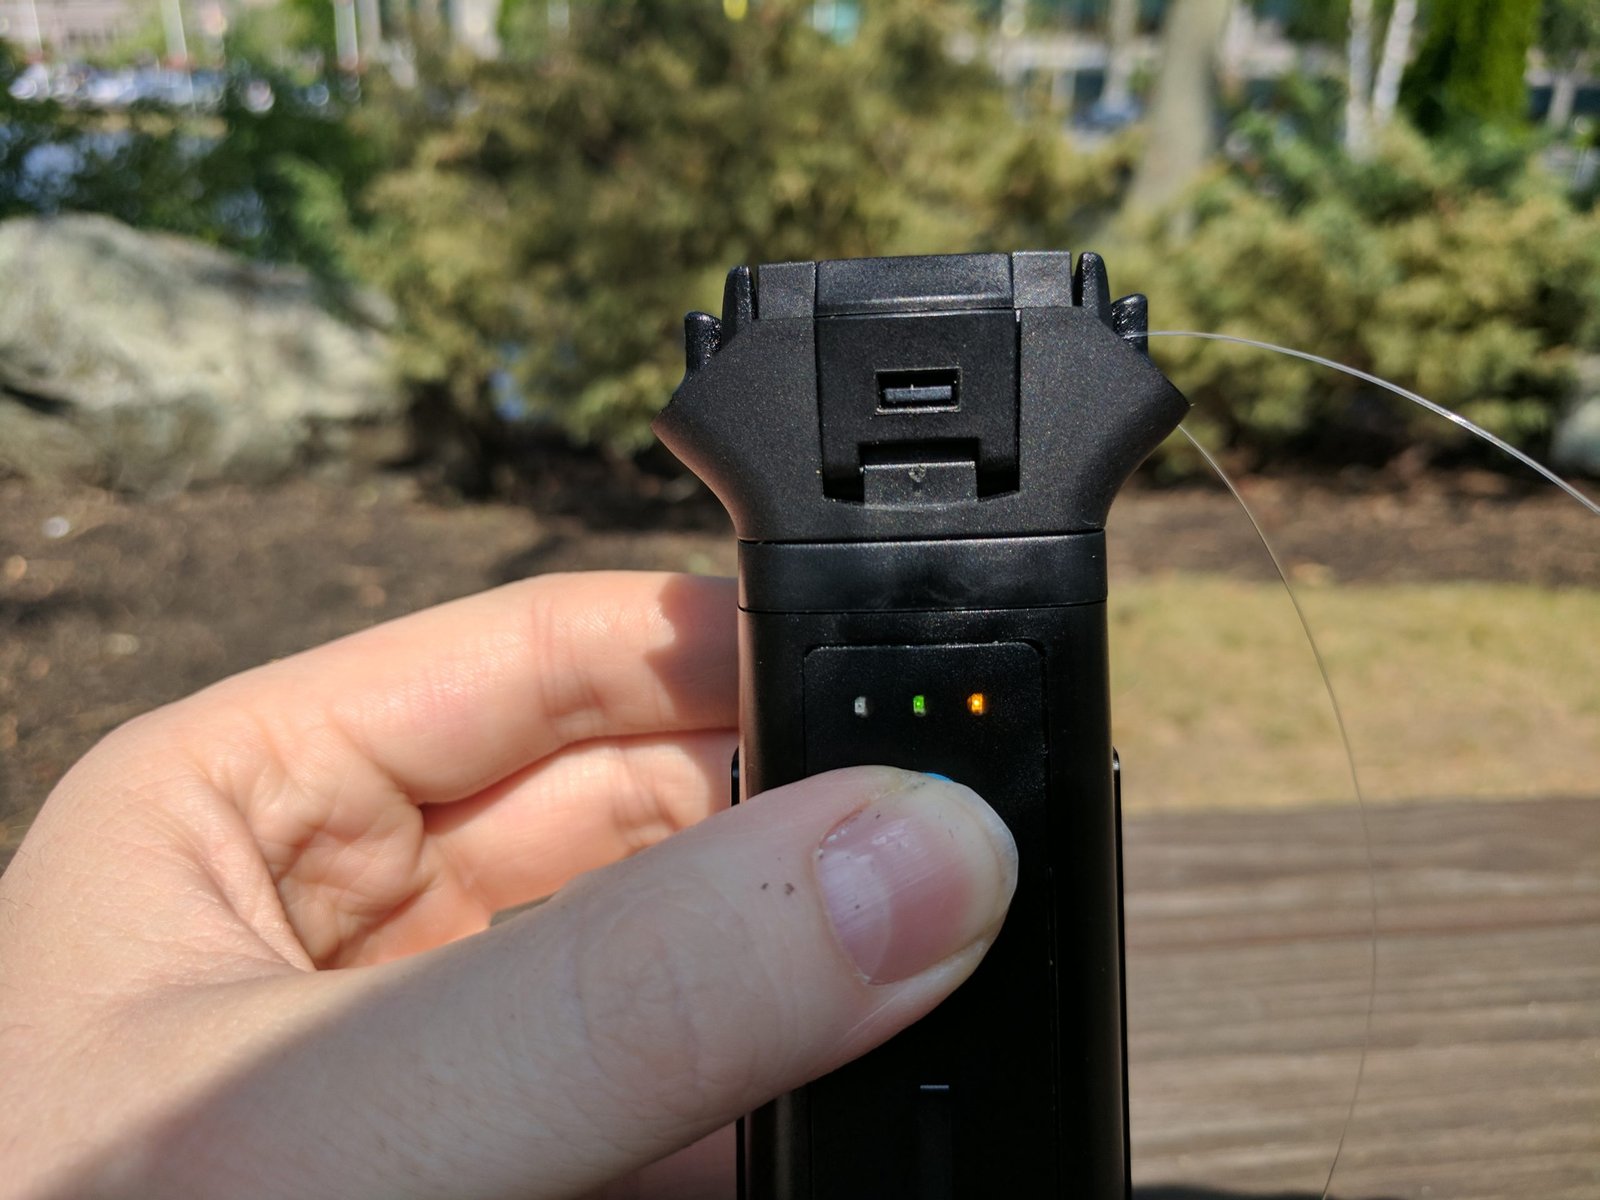
Step 4 - Take a Break!
Once the welding process has begun you should see the lights on the front of the LineWelder begin blinking and hear its motor make some noises. Wait until the lights on the front of the LineWelder stop blinking, then your LineWeld is complete! This should only take about 30 seconds.
Step 5 - Get Fishing!
Your LineWeld is ready to go! Cut the tag end of the line (easily done with a Tauten LineCutter) and get fishing!
Creating Braid-to-Mono/Fluoro Bonds with your TLW1000
The LineWelder is also fully capable of bonding two lines up to .013″ in diameter; whether it be a leader to main line or tippet, monofilament, fluorocarbon or braid. This process is easiest when using the Outrigger Line Clamp accessory.
Step 1 - Clean Your Lines
Clean the section of each line to be welded by wiping 6-7 times with an alcohol prep pad. This will remove any coating that could interfere with the welding process. If you're using Tauten MonoWeld monofilament line you don't need to clean it.

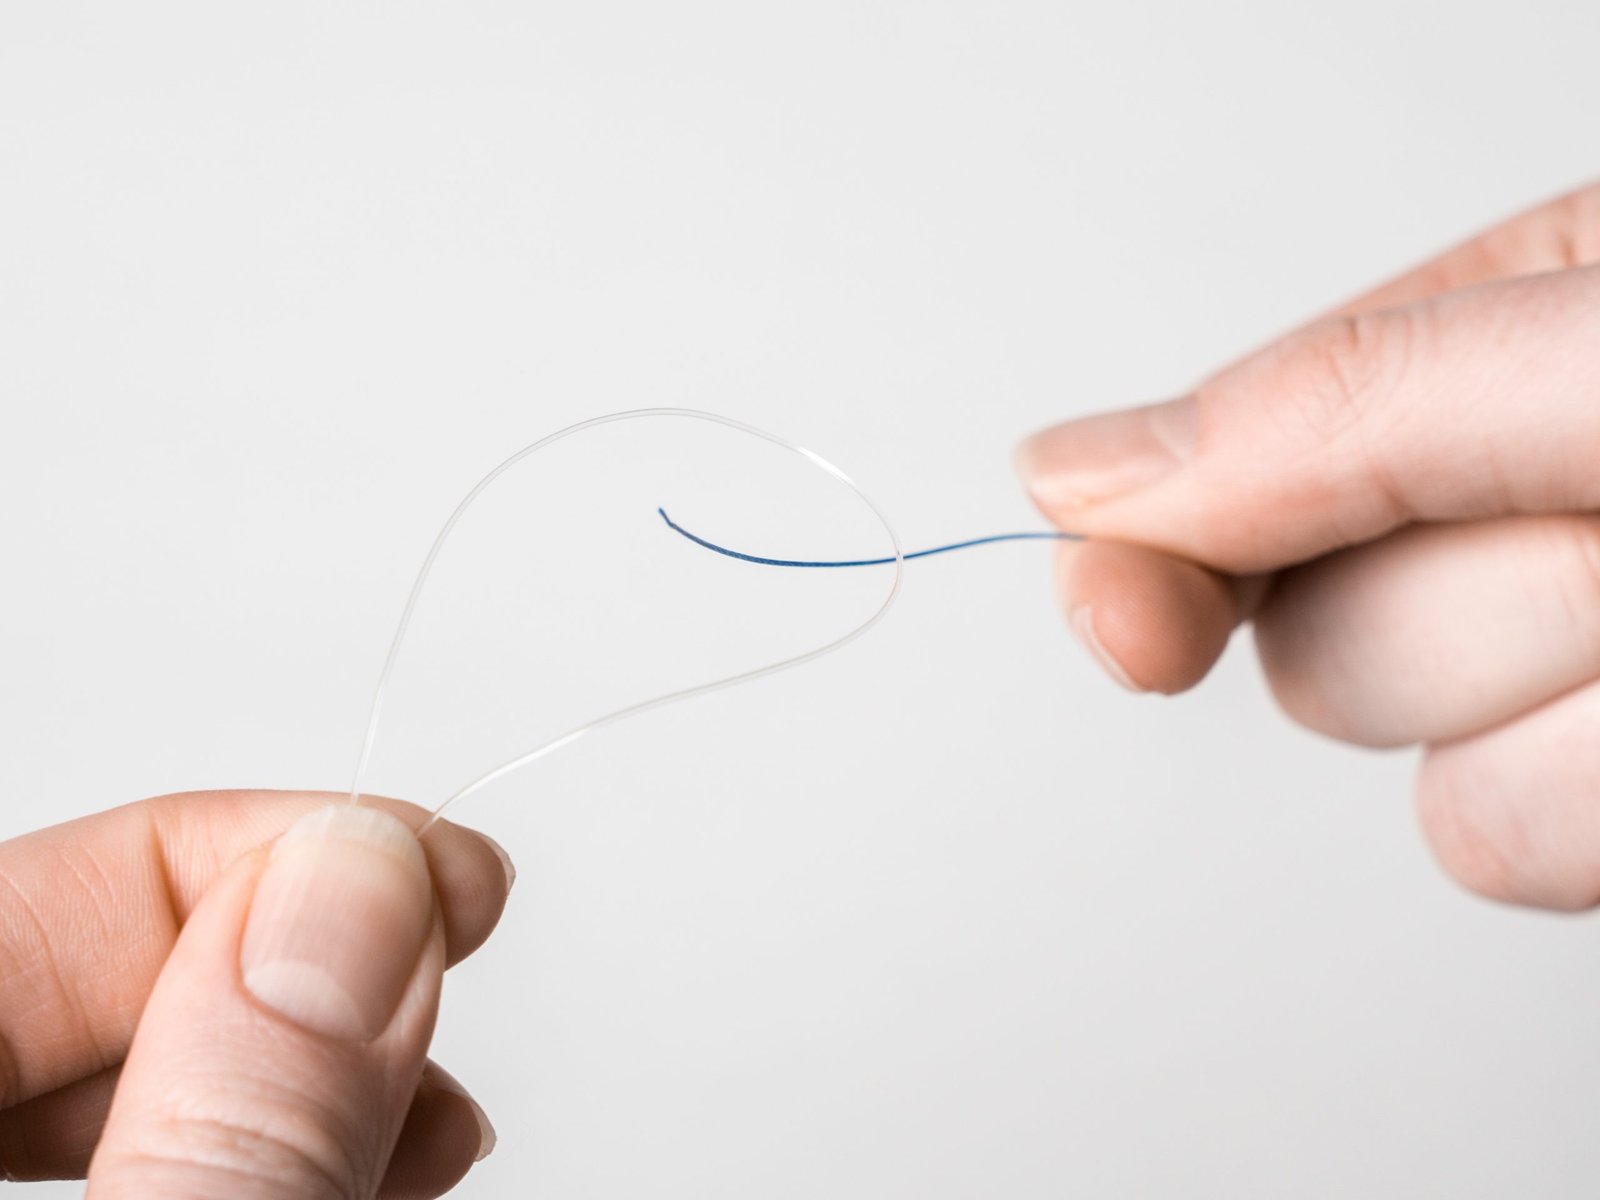
Step 2 - Loop Lines Together
Loop the two lines together and pull them taught.
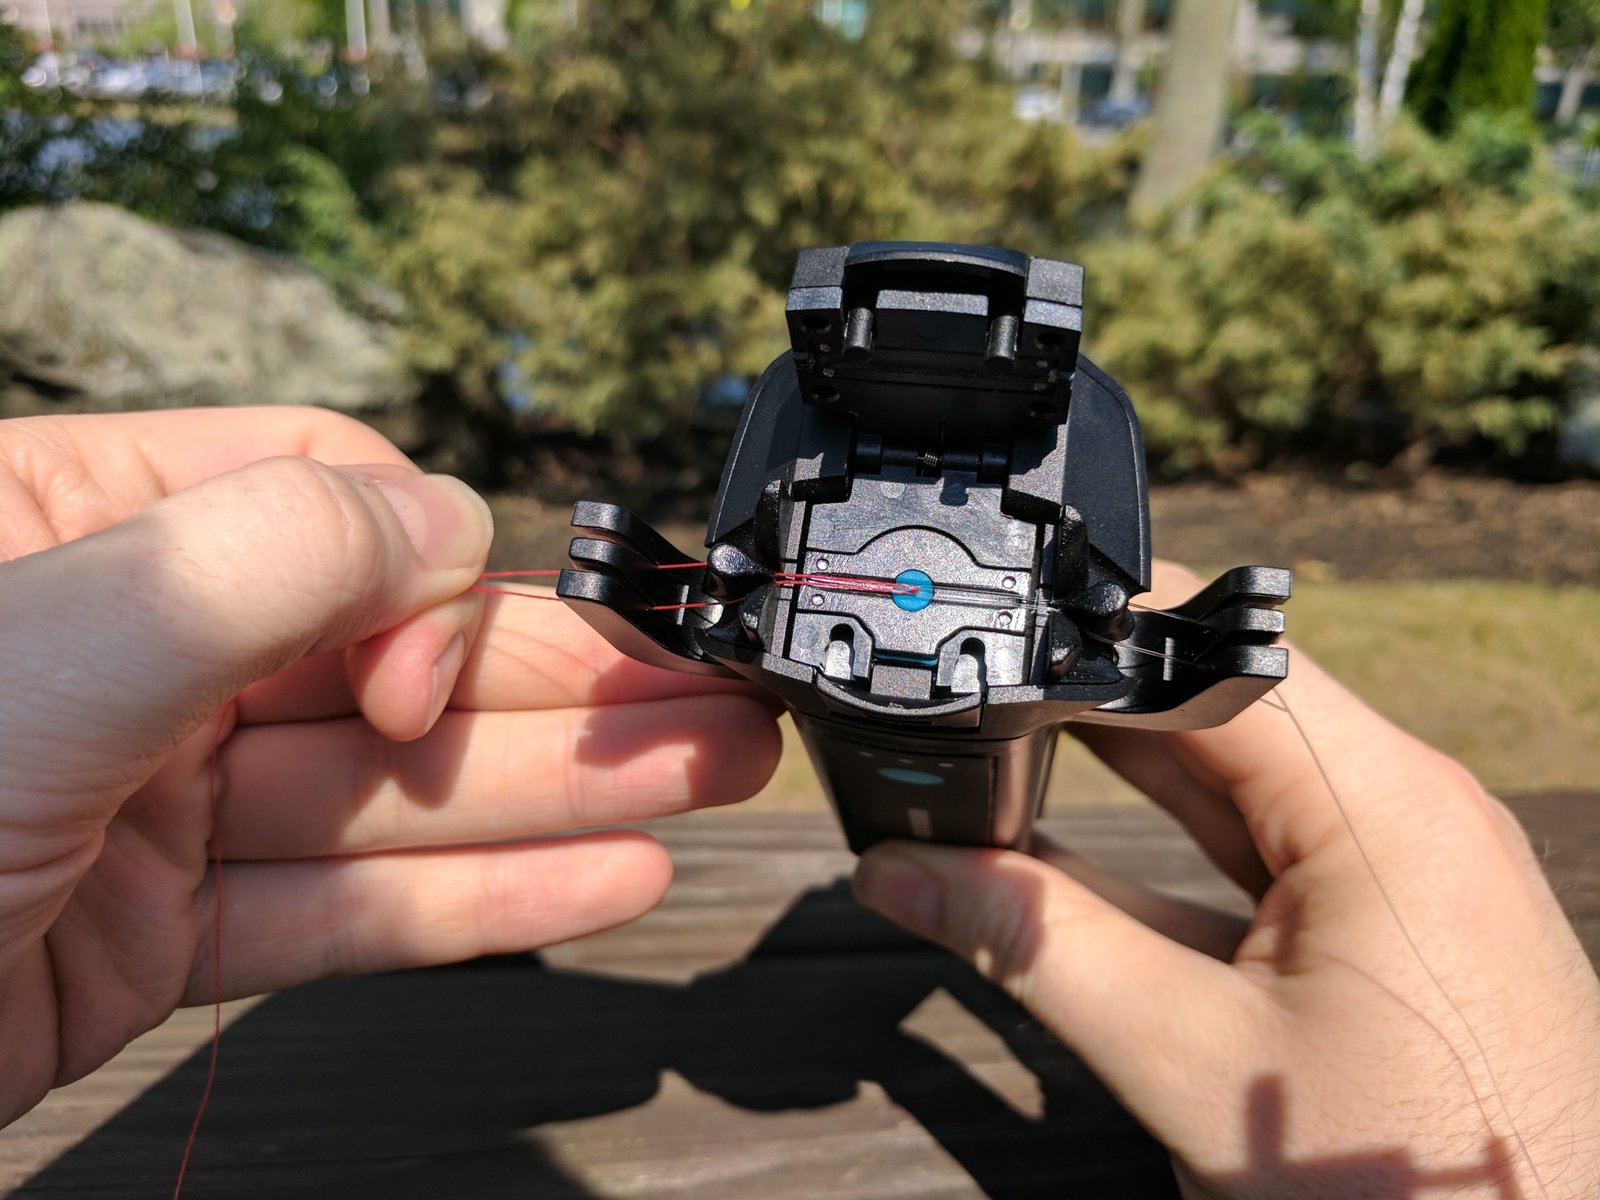
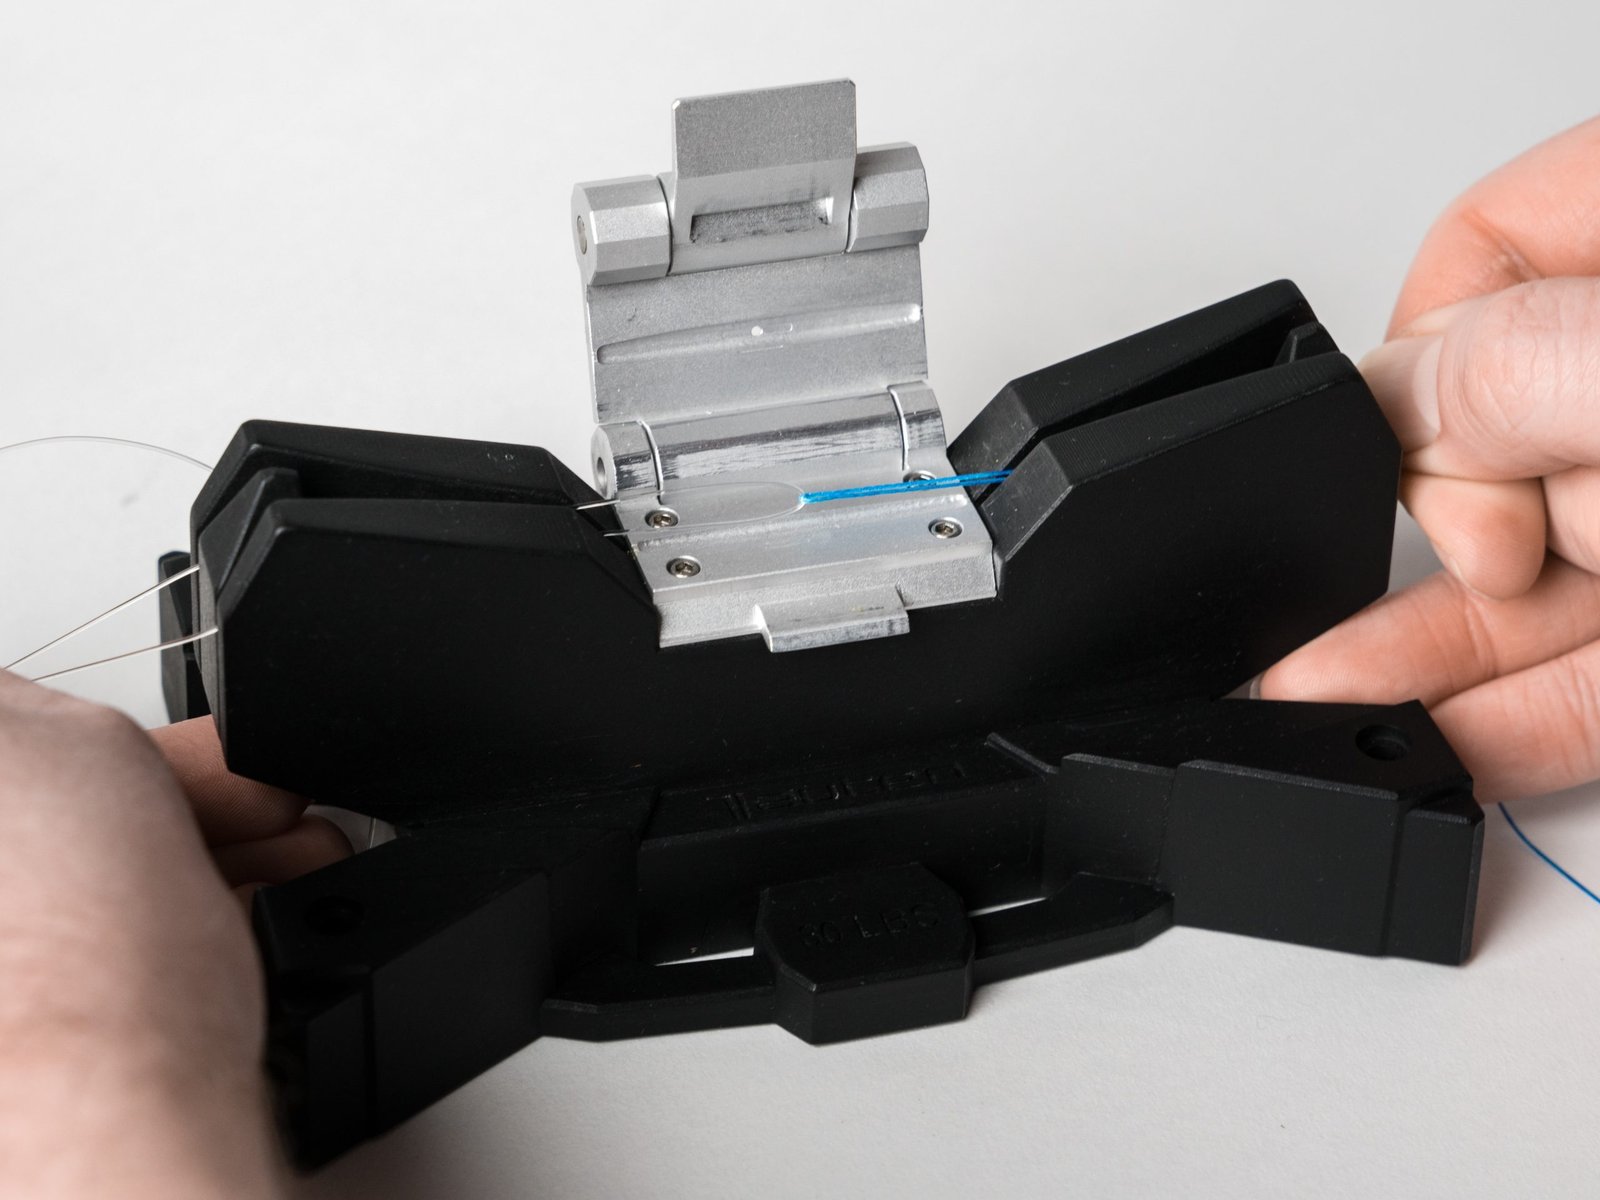
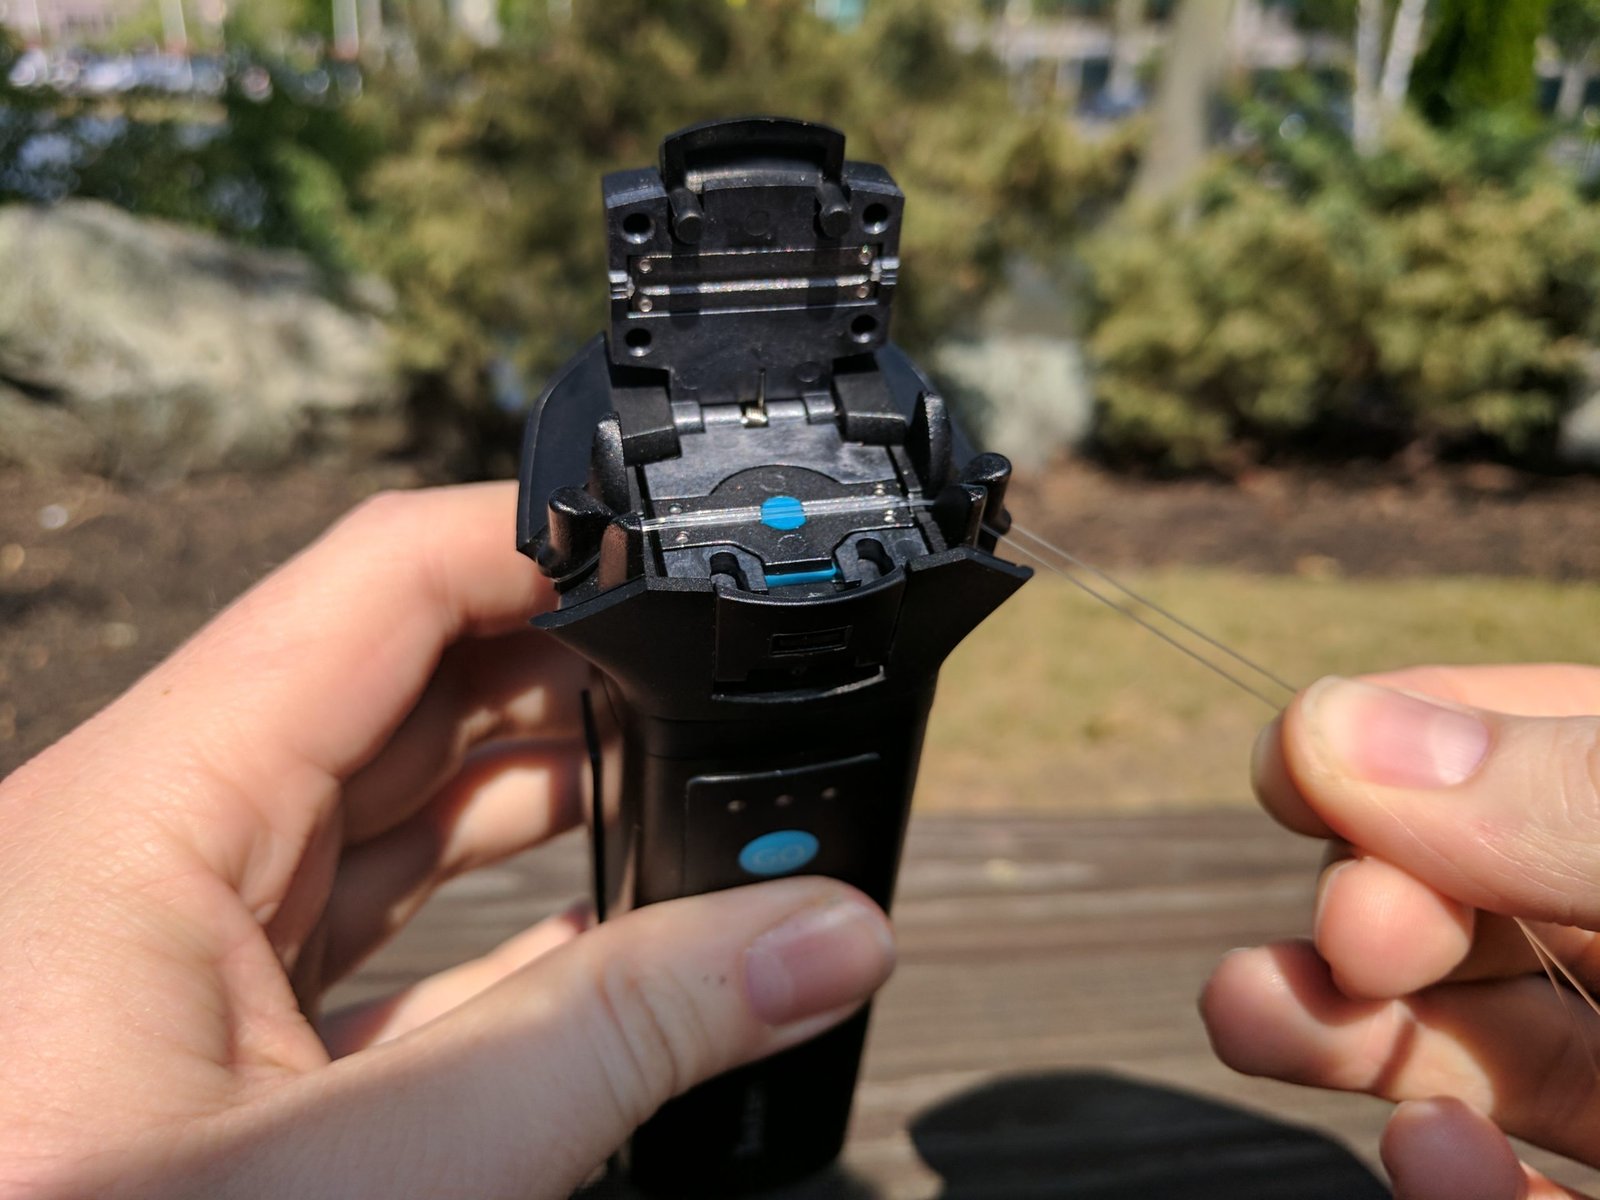
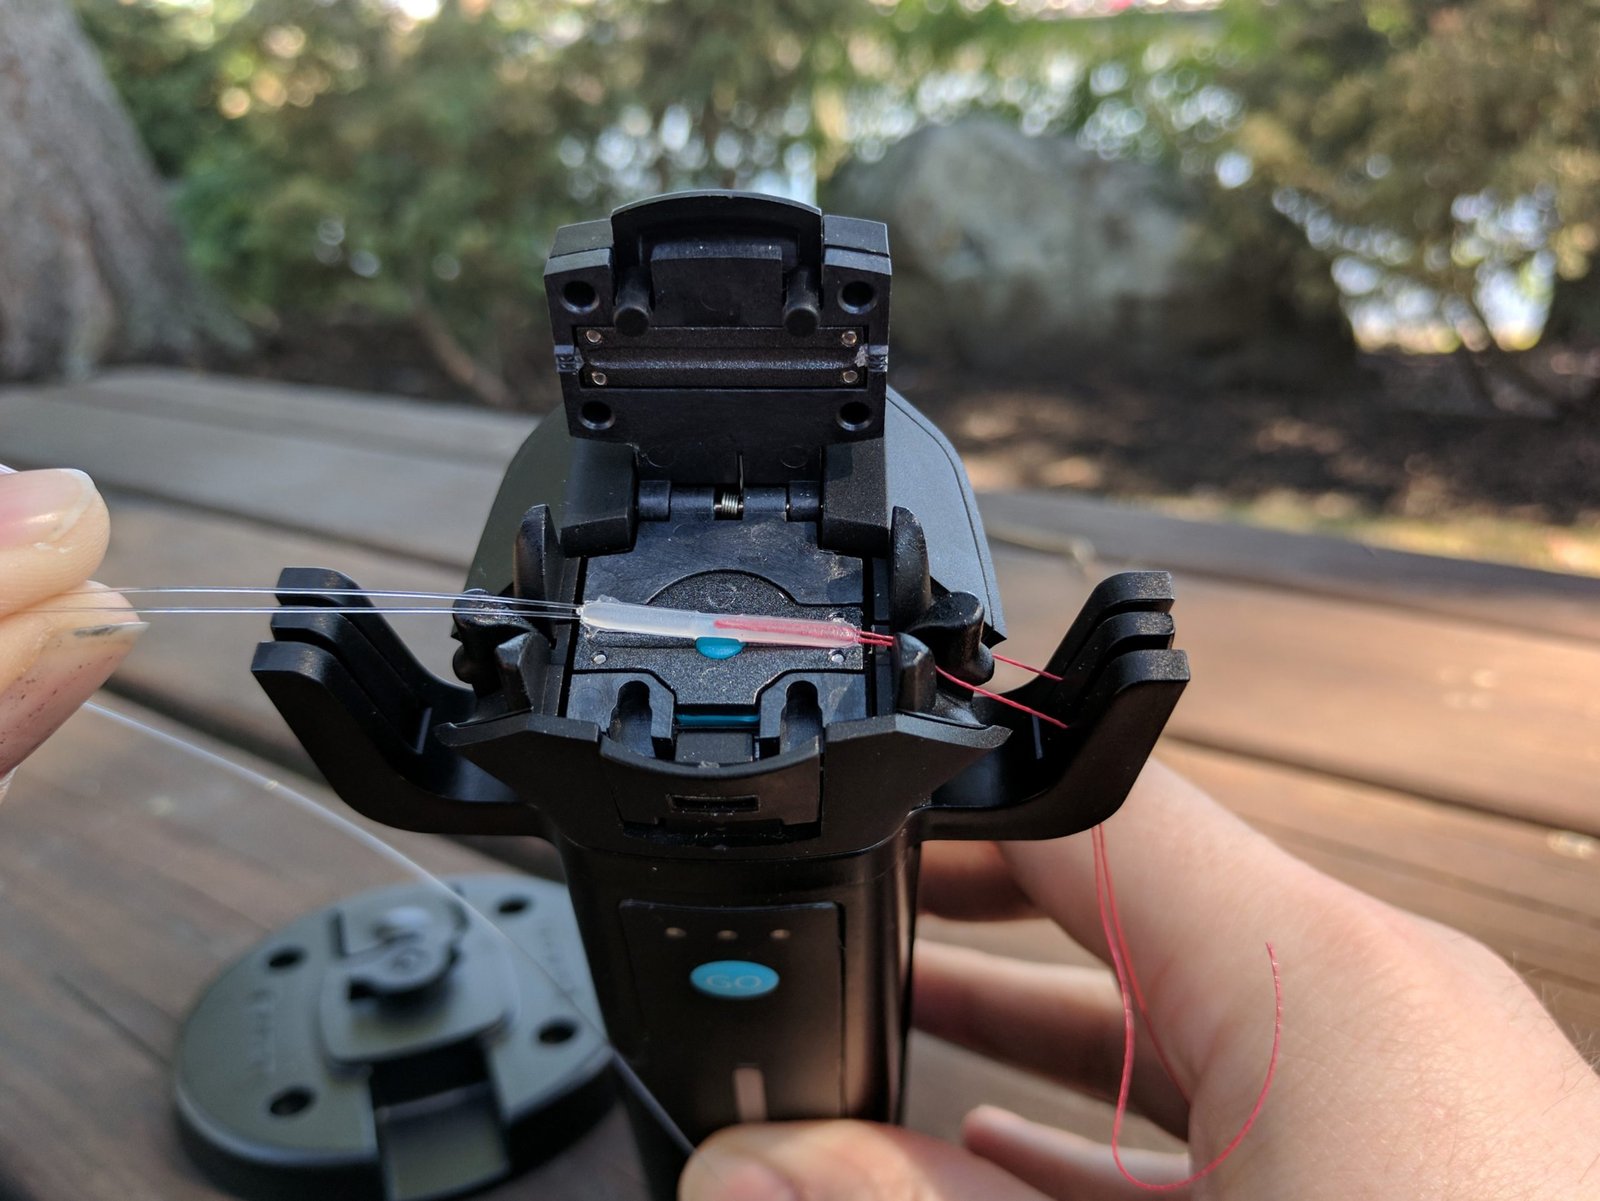
Step 3 - Insert Lines Into Welder
Place the looped lines into the LineWelder head, keeping the joint between the lines over the blue dot at the center of the weld cavity, and cinch the lines down tightly in between the "fingers" on each outrigger of your Outrigger Line Clamp accessory. This maintains tension on the lines to keep them from moving during the process.
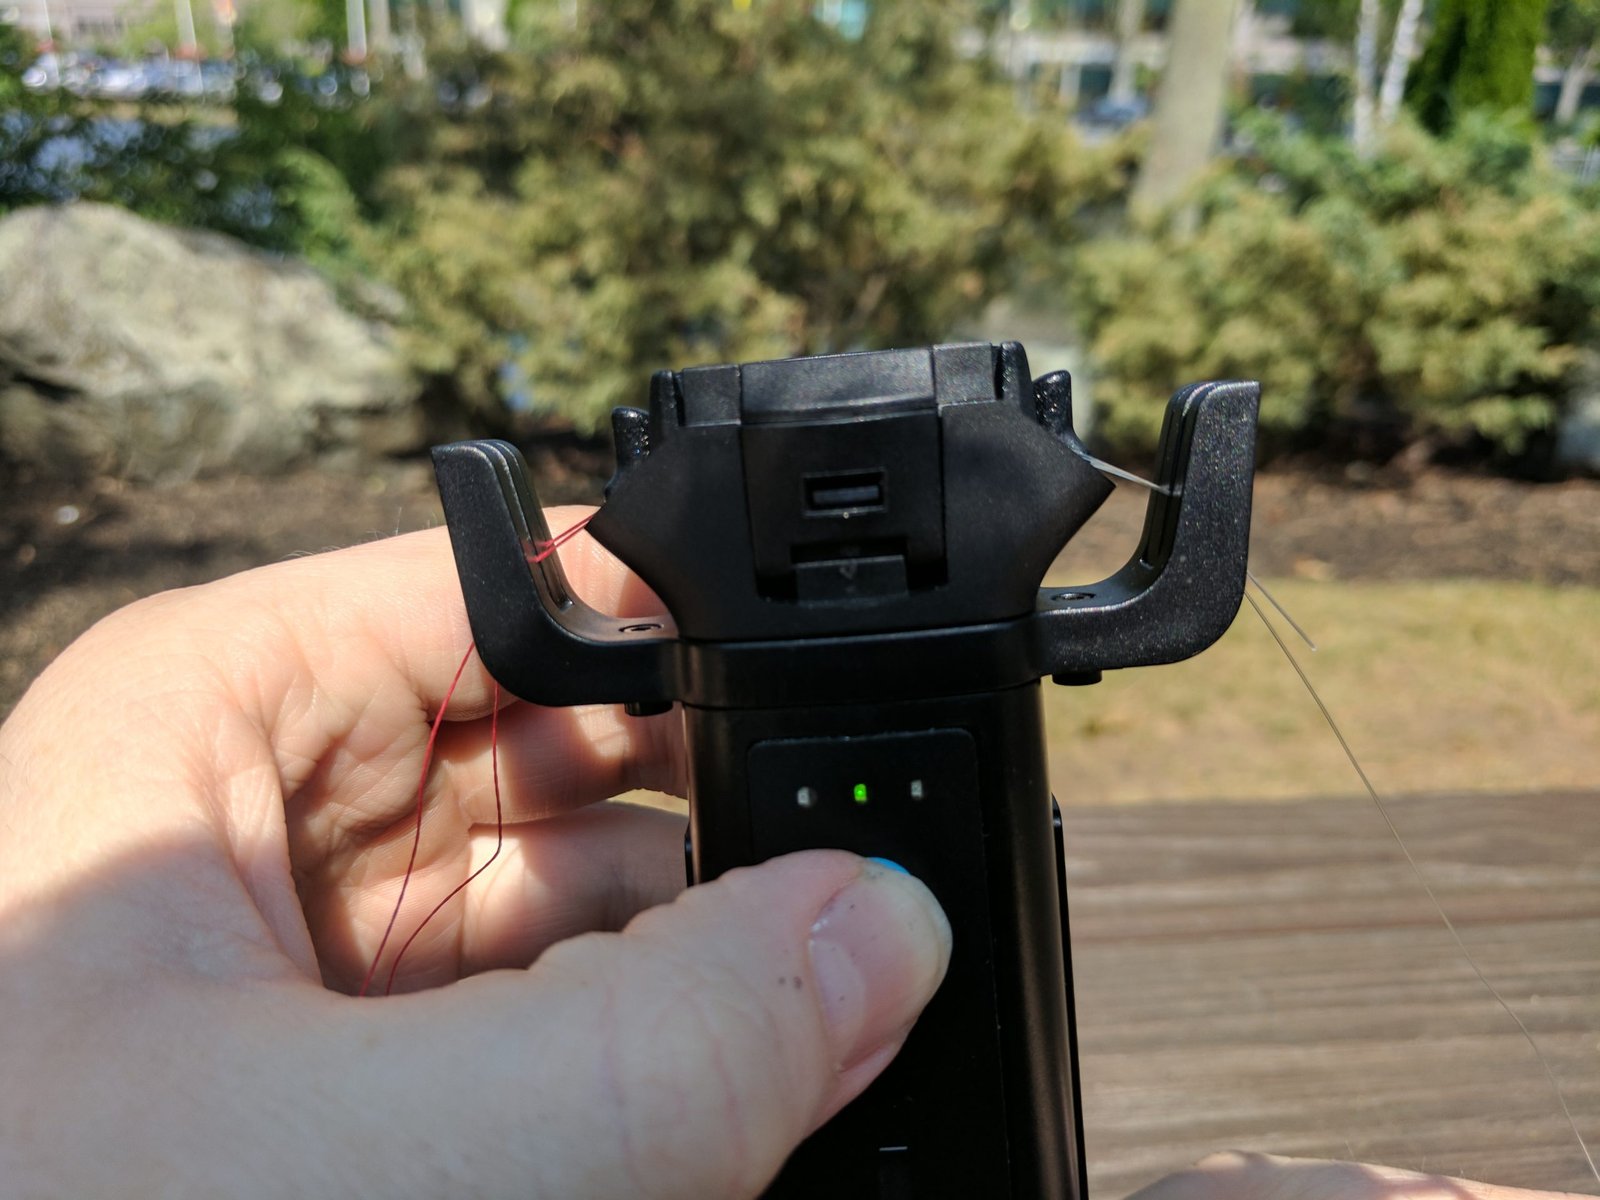
Step 4 - Close the Lid and Press GO!
Close cover of the LineWelder head and push the latches closed to lock it in place. Then press the blue GO button to begin the welding process!
Step 5 - Your LineWeld Is Ready!
Once the welding process has begun you should see the lights on the front of the LineWelder begin blinking and hear its motor make some noises. Wait until the lights on the front of the LineWelder stop blinking, then your LineWeld is complete! This should only take about 30 seconds.
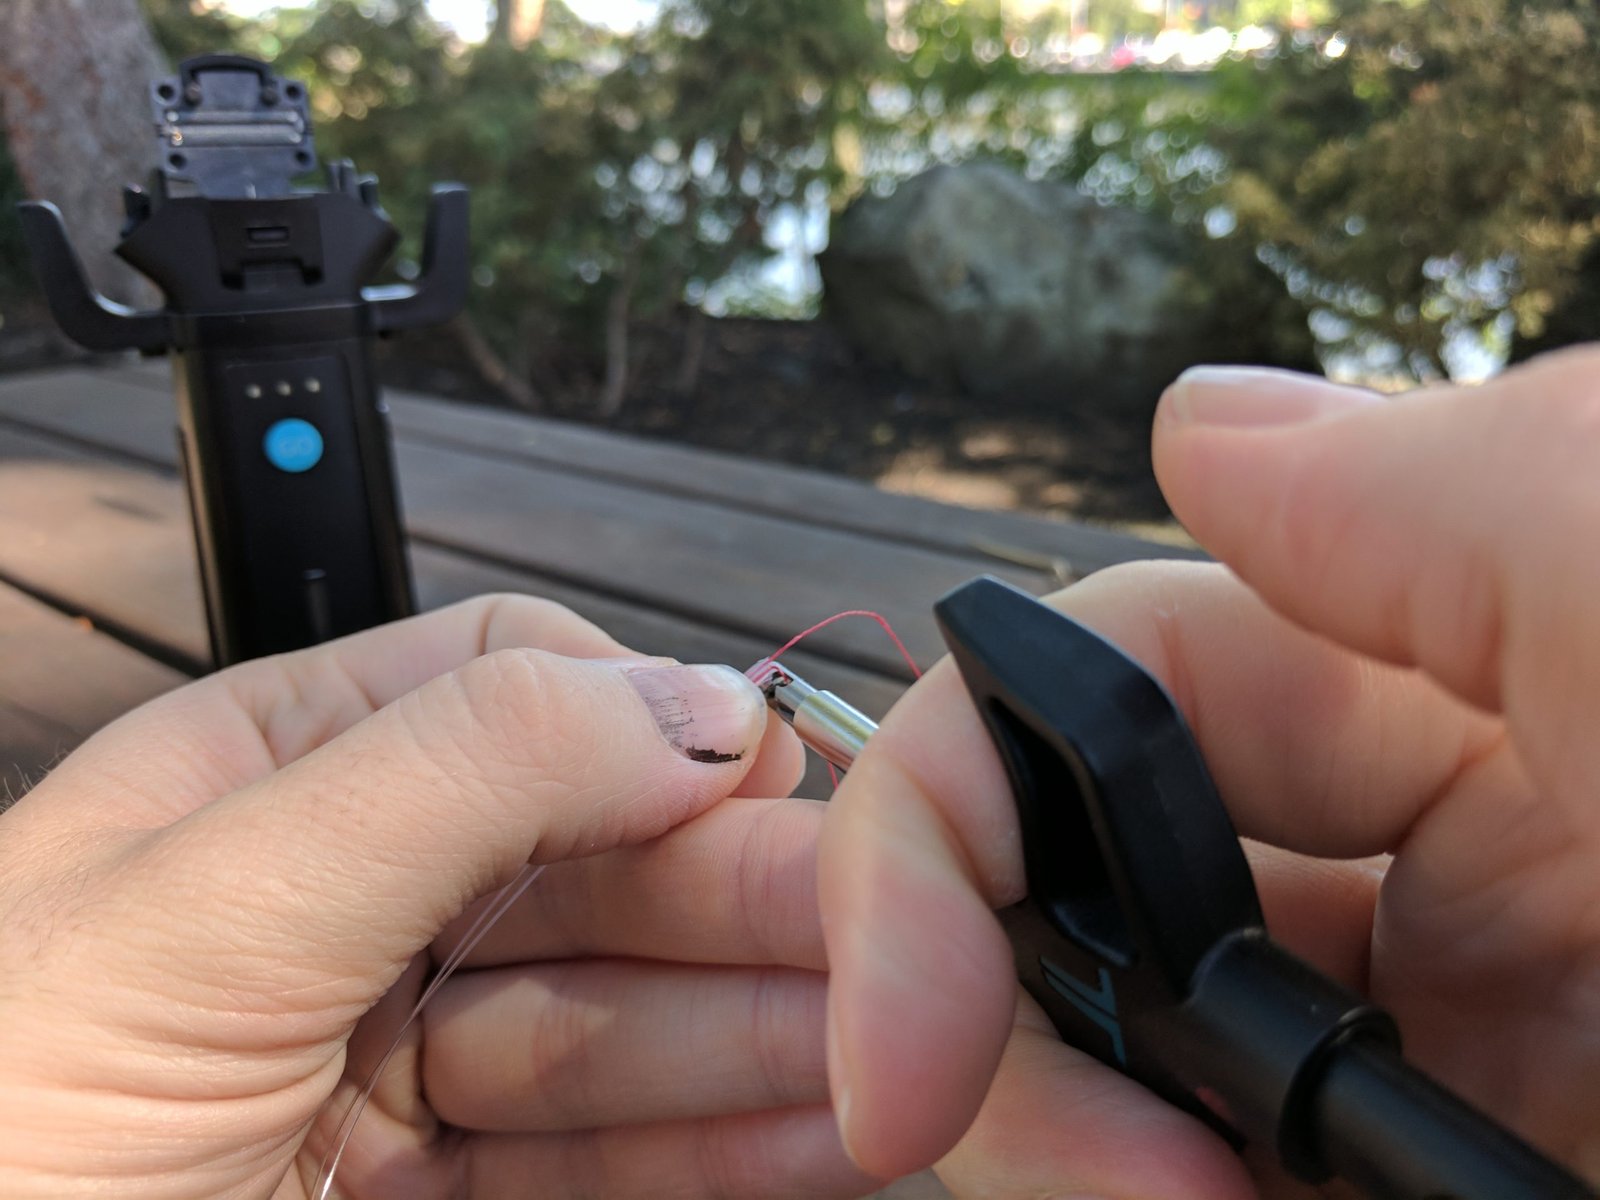
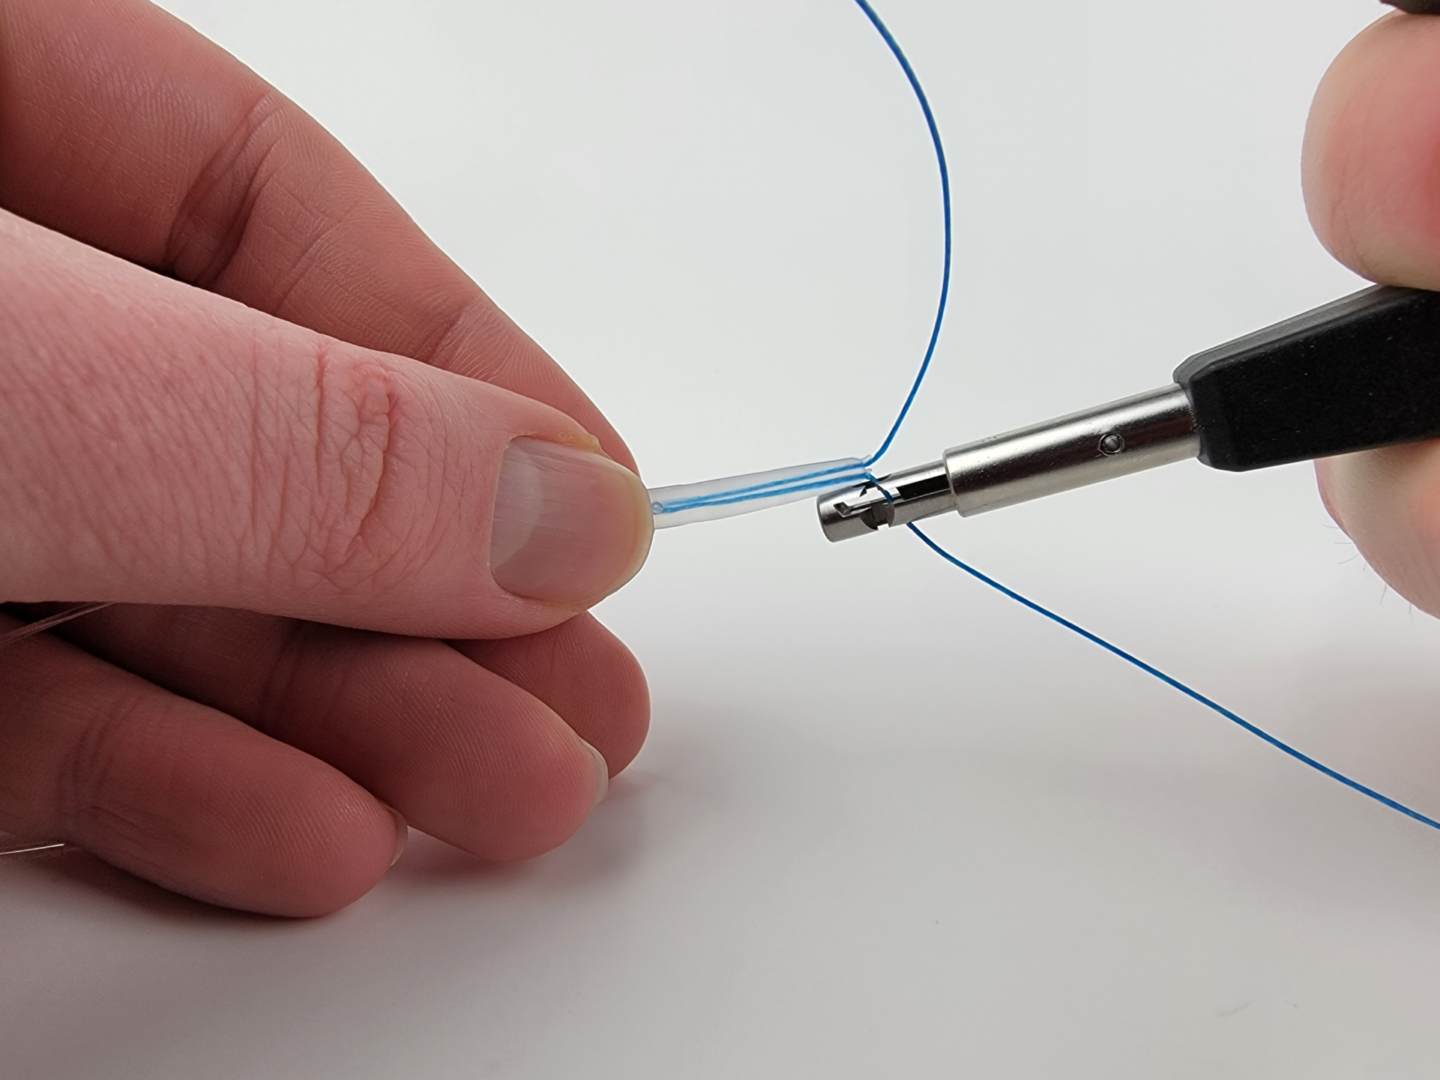
Step 6 - Trim Tag Ends
Cut the tag end of the line (easily done with a Tauten LineCutter).
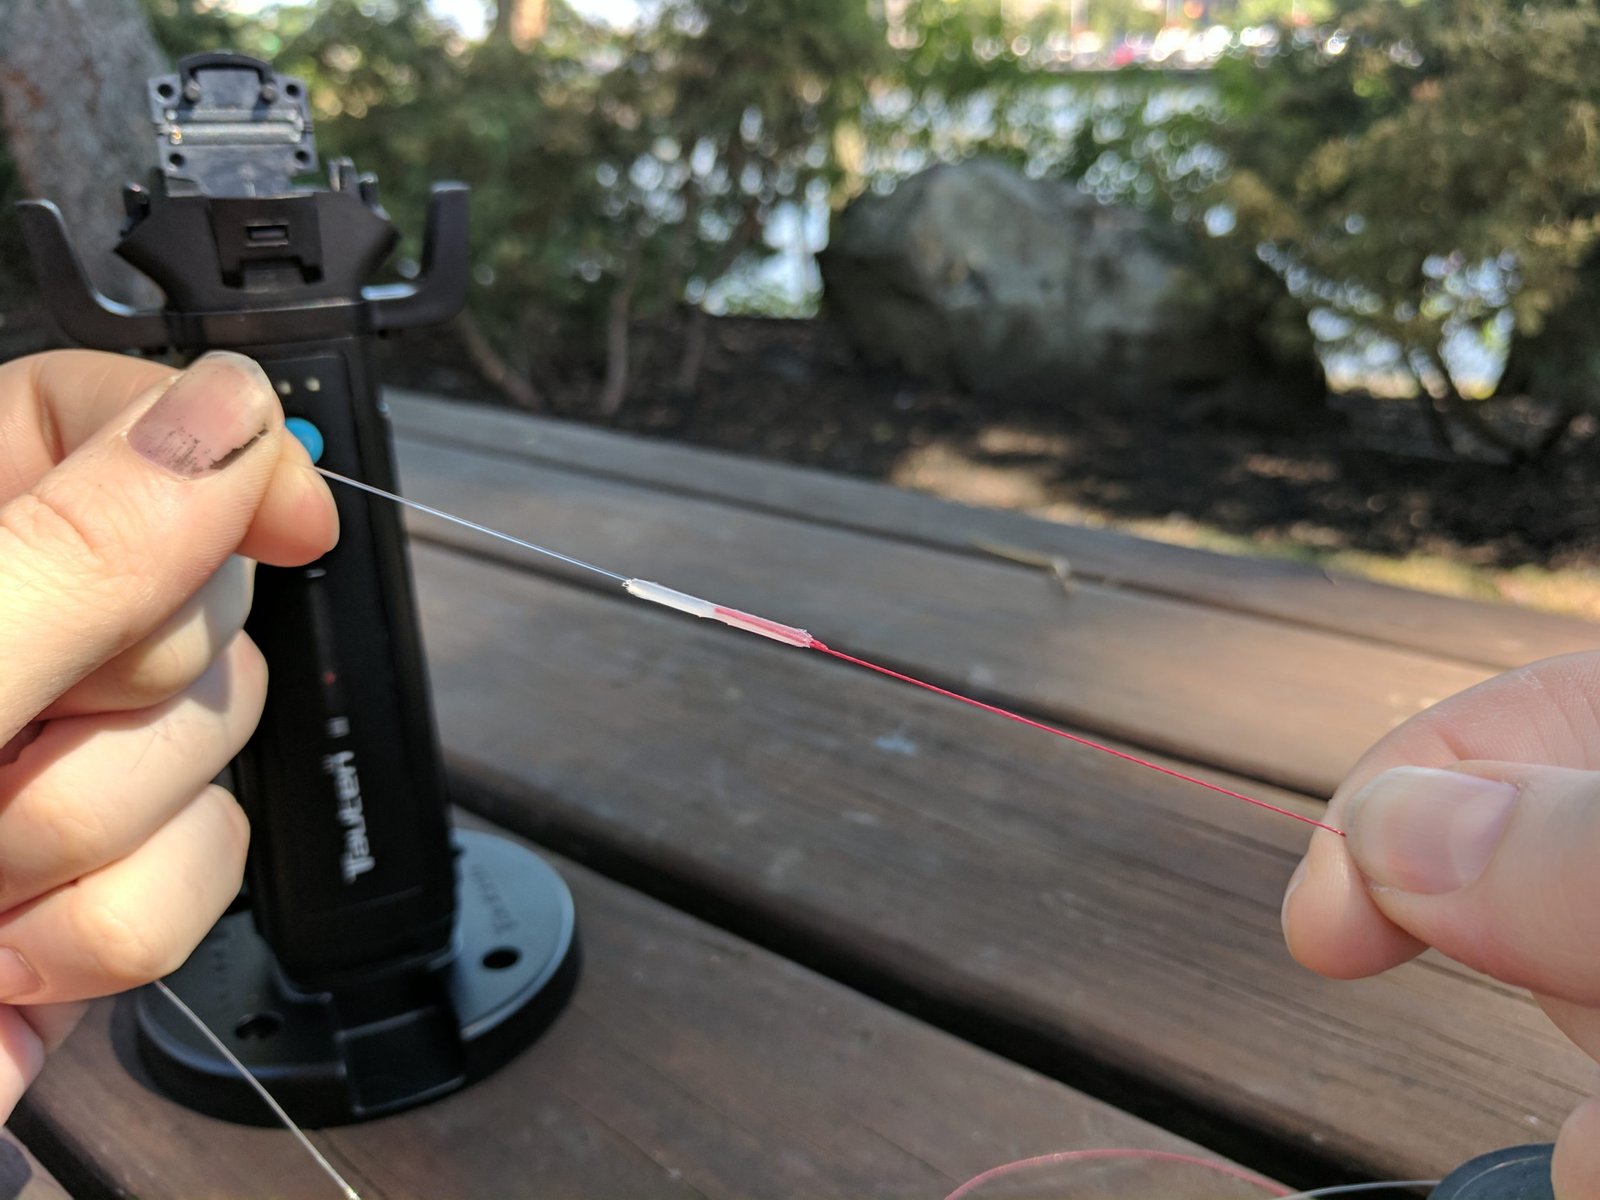
Step 7 - Get Fishing!
Your LineWeld is ready to go; time to catch those prize winners!
TLW1000 Demonstration Videos
See the LineWelder in action in the videos below! You can also find more videos on the Tauten Sports YouTube channel!
TLW1000 LineWelder FAQ
Product Questions For The Tauten Line Welder
A fully charged LineWelder can perform up to 50 welds.
Each cartridge holds enough polymer material to create approximately 12 welds.
Cartridges are available on this website in packs of three. You can purchase them here.
Yes! The system can take most braided lines up to a strength of approximately 50 lbs. Contact us to confirm that the LineWelder is compatible with your line.
Yes! The system can take monofilament or fluorocarbon lines up to a strength of approximately 12 lbs. Contact us to confirm that the LineWelder is compatible with your line.
Yes! This can be accomplished by looping the two lines together before inserting them into the LineWelder. This process is easiest when using an “Outrigger” Line Clamp.
You can find instructions on the “Learn to LineWeld” page.
Unfortunately no; the weld length is non-adjustable.